← All case studies

House · 110 m² · Kyiv · 2024

Rebuilding a 110 m² house near Kyiv — from a ruin to a bright interior with a fireplace

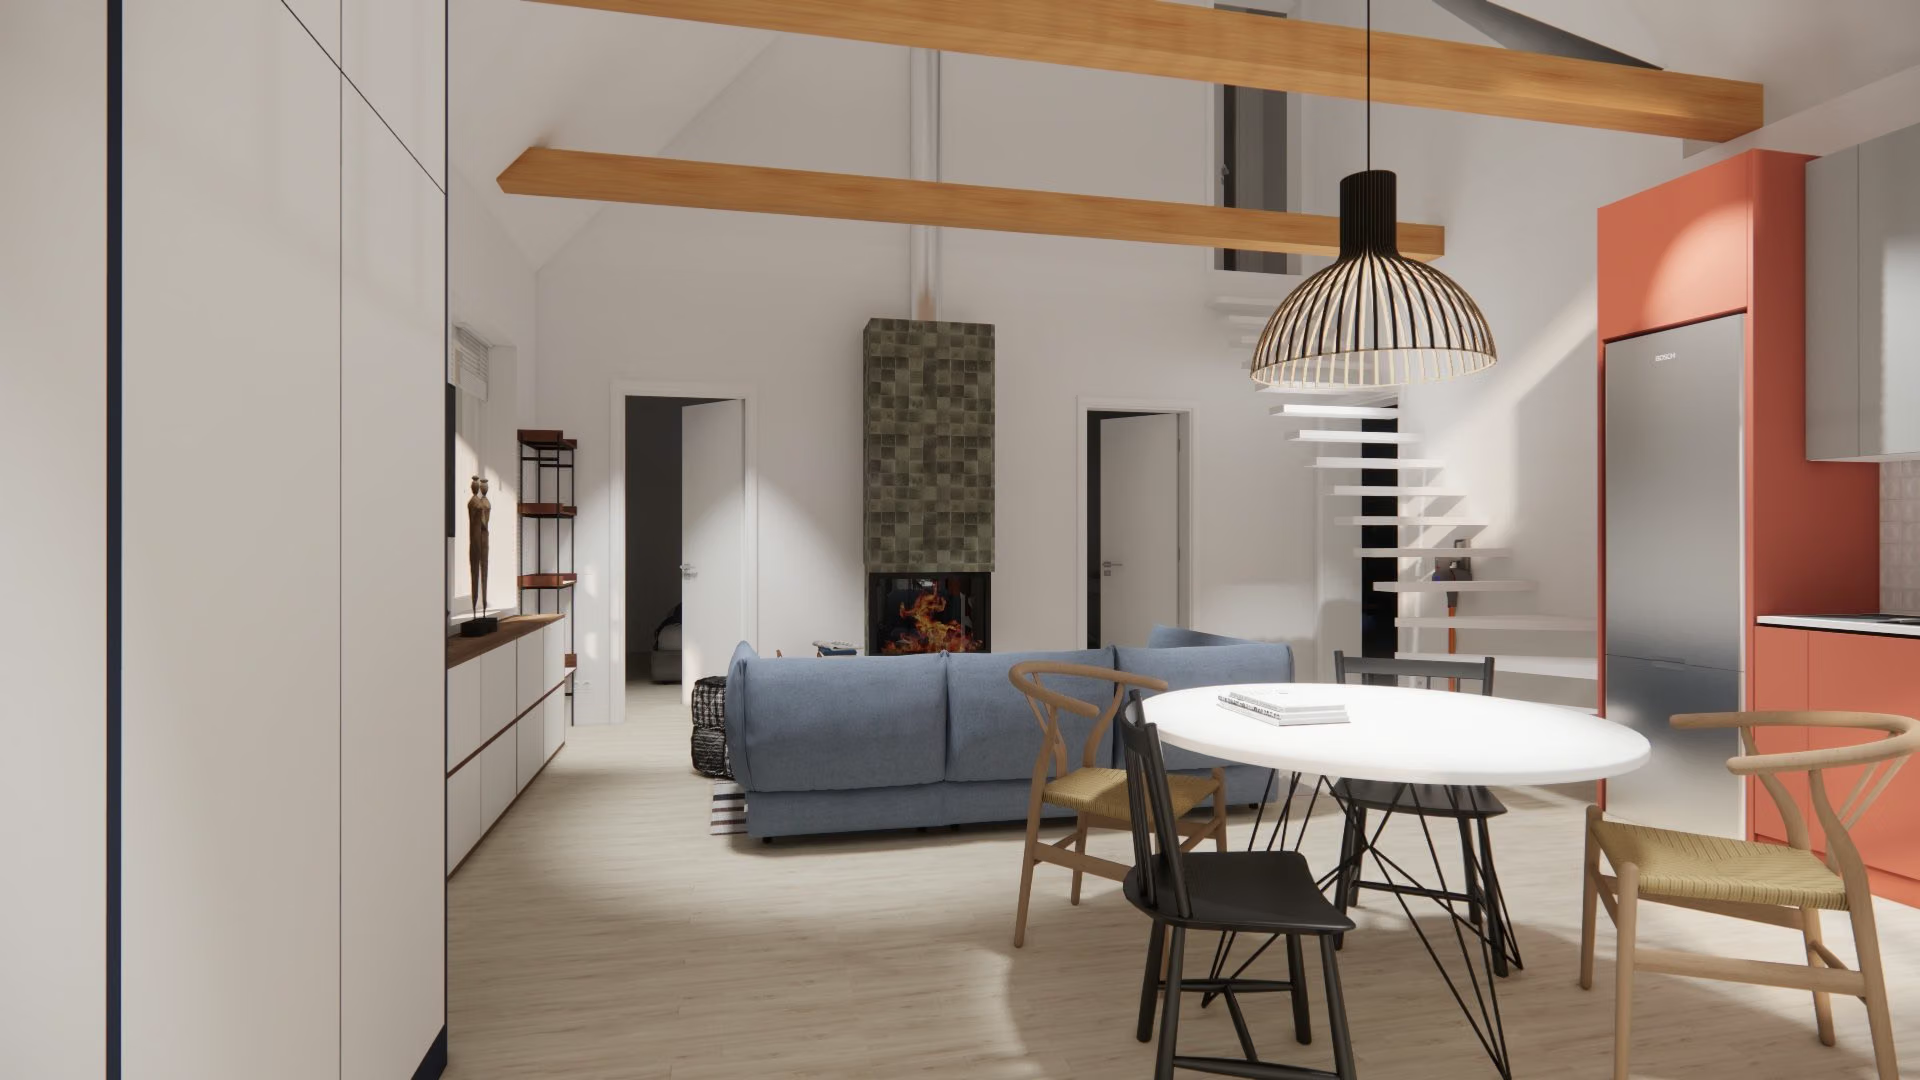
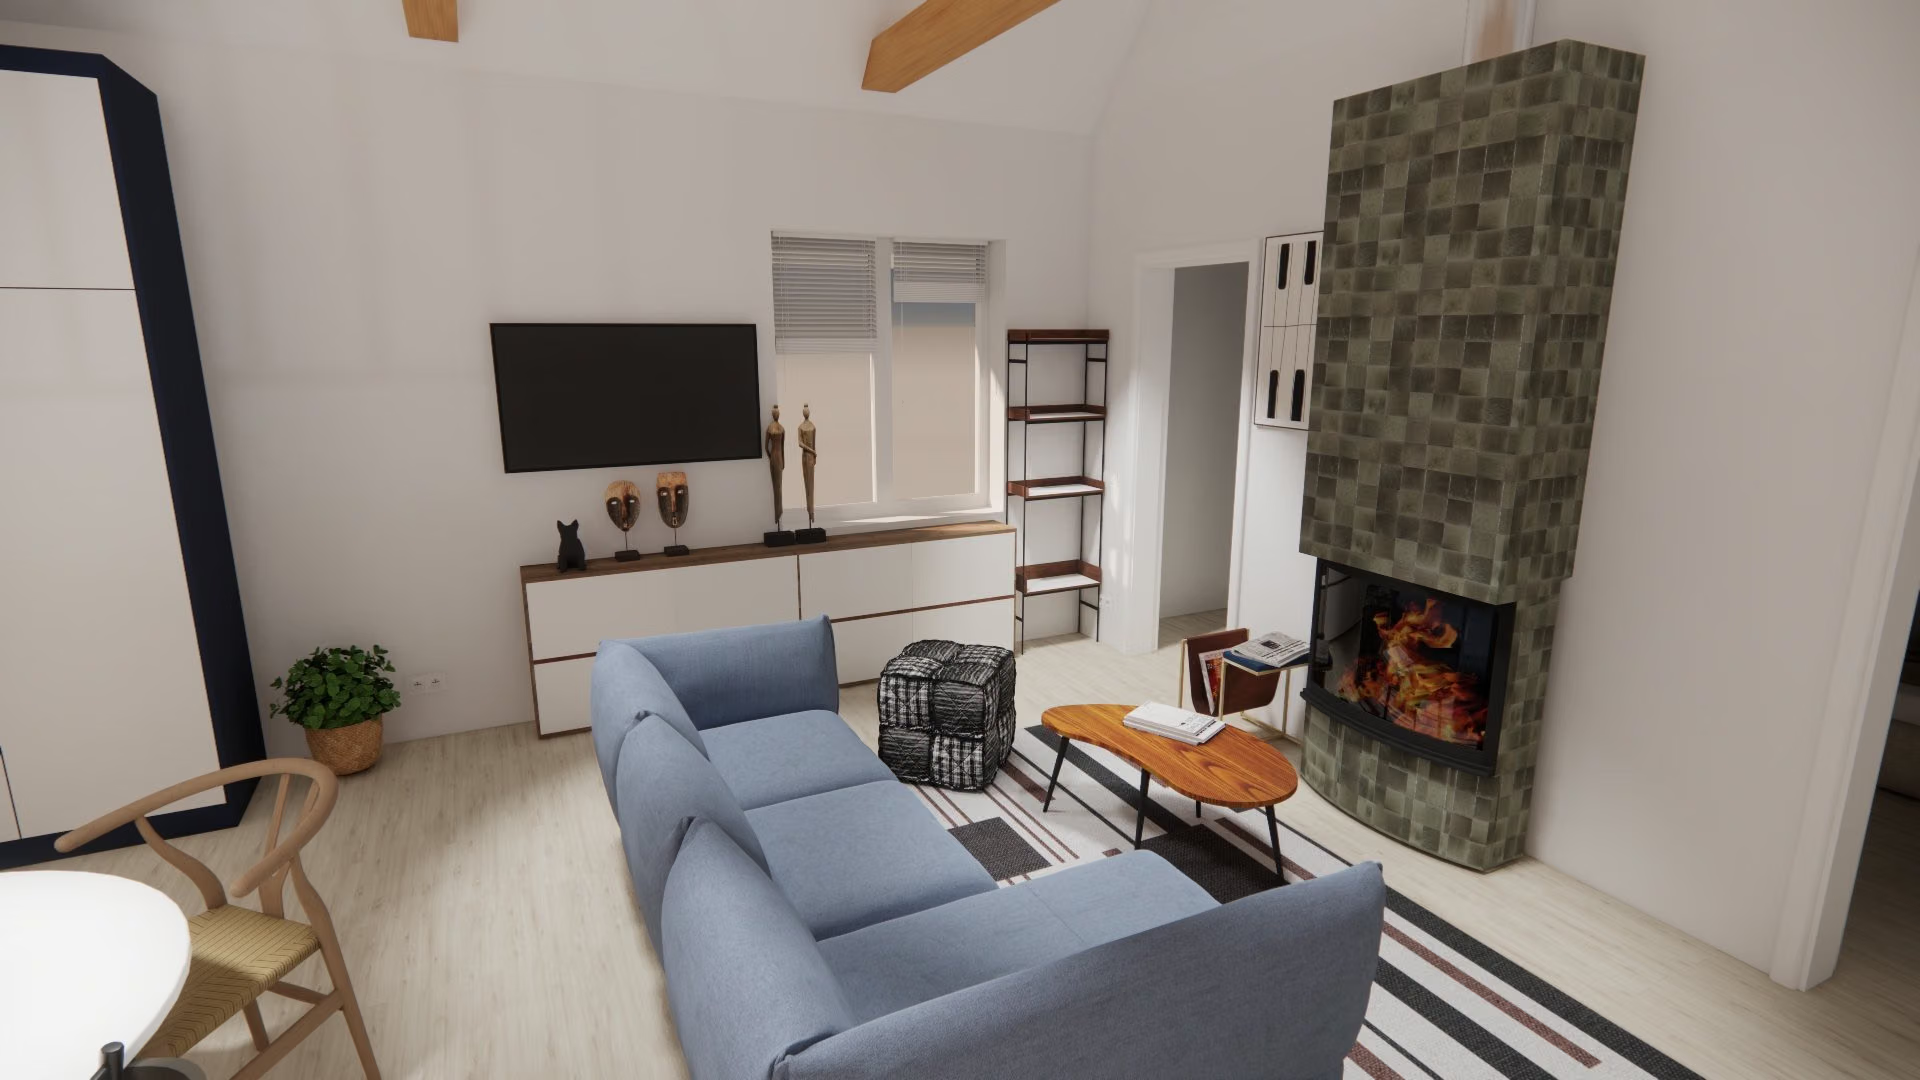
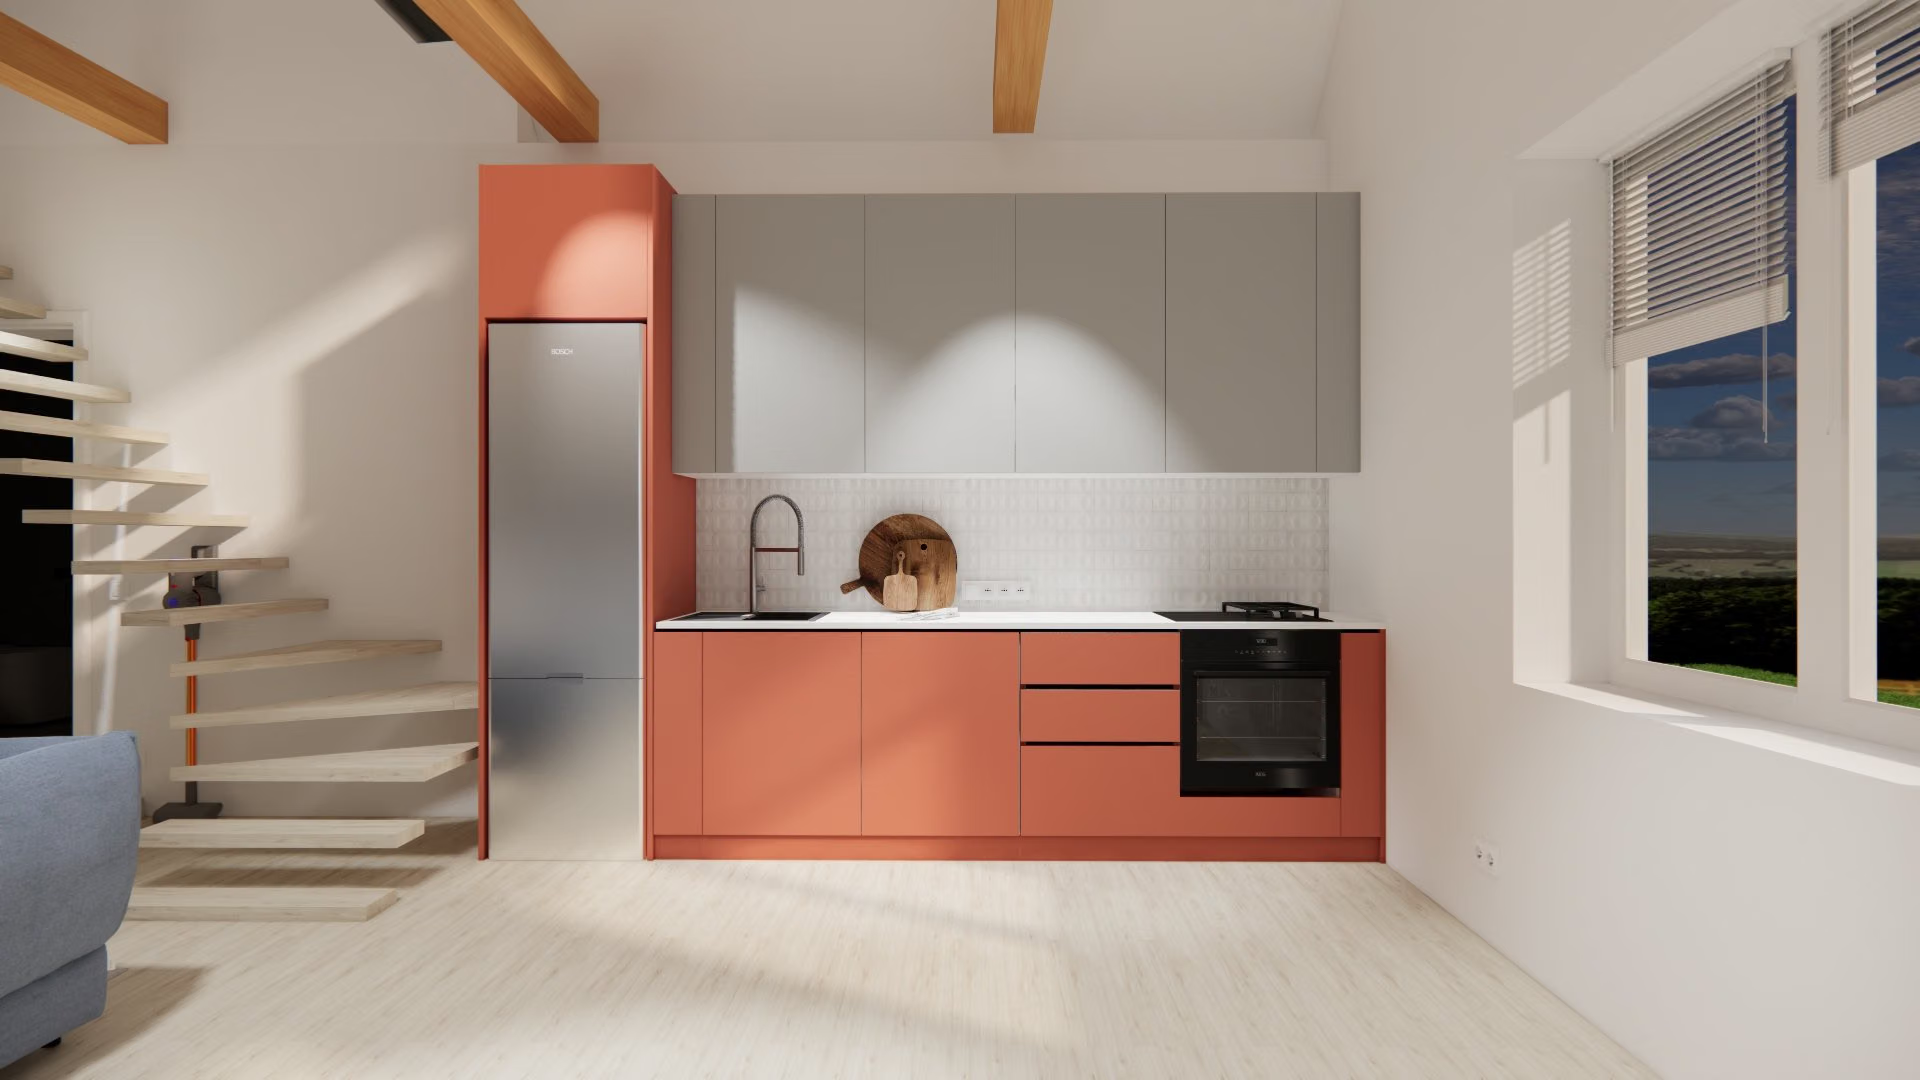
Visualisation of the living and dining area: timber beams under the ceiling, fireplace, stairs and a terracotta kitchen.
Design visualisation
01Result

How the interior looks

Completed
Kyiv

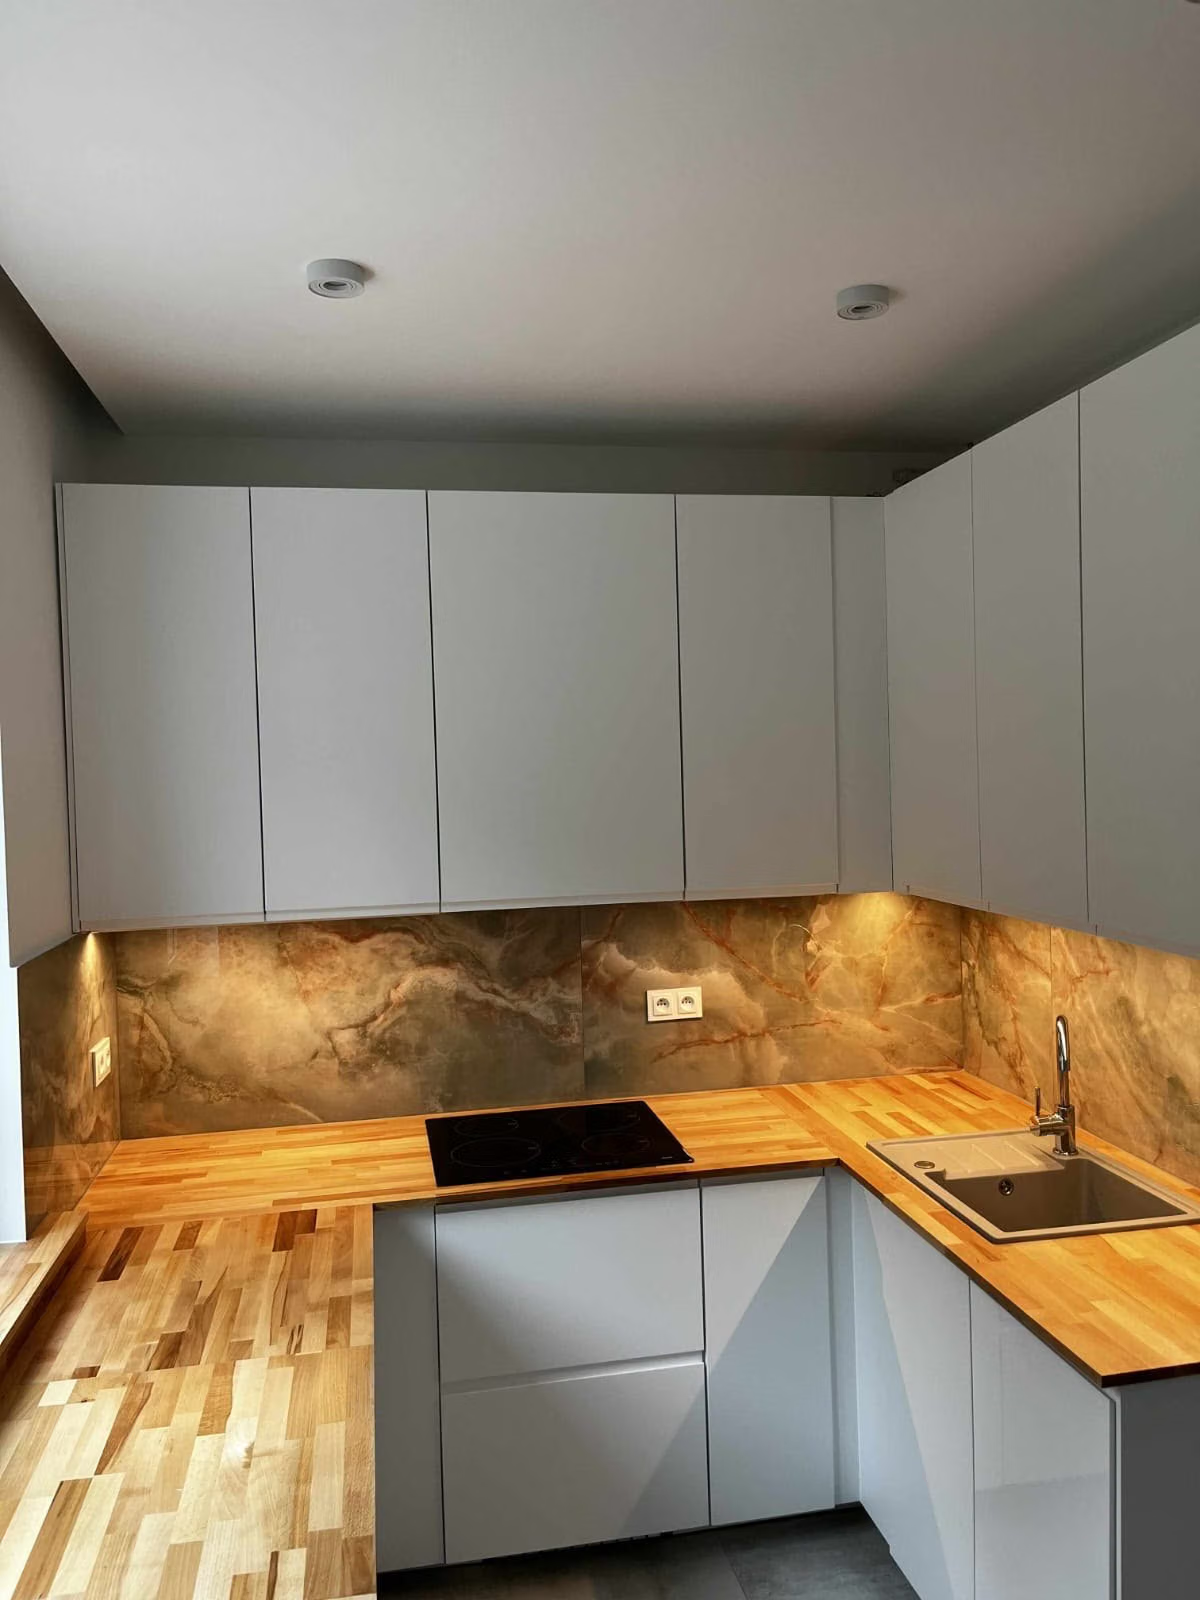
Of the old house outside the city only the outer walls were left — the clients rebuilt the rest: foundations, walls, roof and an extension. They had a clear vision of the interior, so my part was the functional layout, stairs in a very tight spot, made-to-measure furniture and the drawings carpenters and electricians worked from.

110 m²

floor area

House

180–280

thousand PLN · estimated renovation cost

Estimate based on Łódź market rates (2026) — what fitting out the interior of a similar house would cost, without structural work (foundations, walls, roof). Not the client's bill.

2

storeys

House with an extension

02Starting point

What the clients came with

House · 110 m² · Kyiv. The main needs and problems the project started from.

  1. 01

    An old house outside the city to rebuild from the ground up: foundations, walls, roof and an extension.

  2. 02

    The clients had a ready vision of the interior — they needed a functional layout and made-to-measure furniture.

  3. 03

    The wiring had to follow the design, and the builders needed precise drawings.

03Before and after

How it was and how it is

The same rooms before the renovation, in the design and after it.

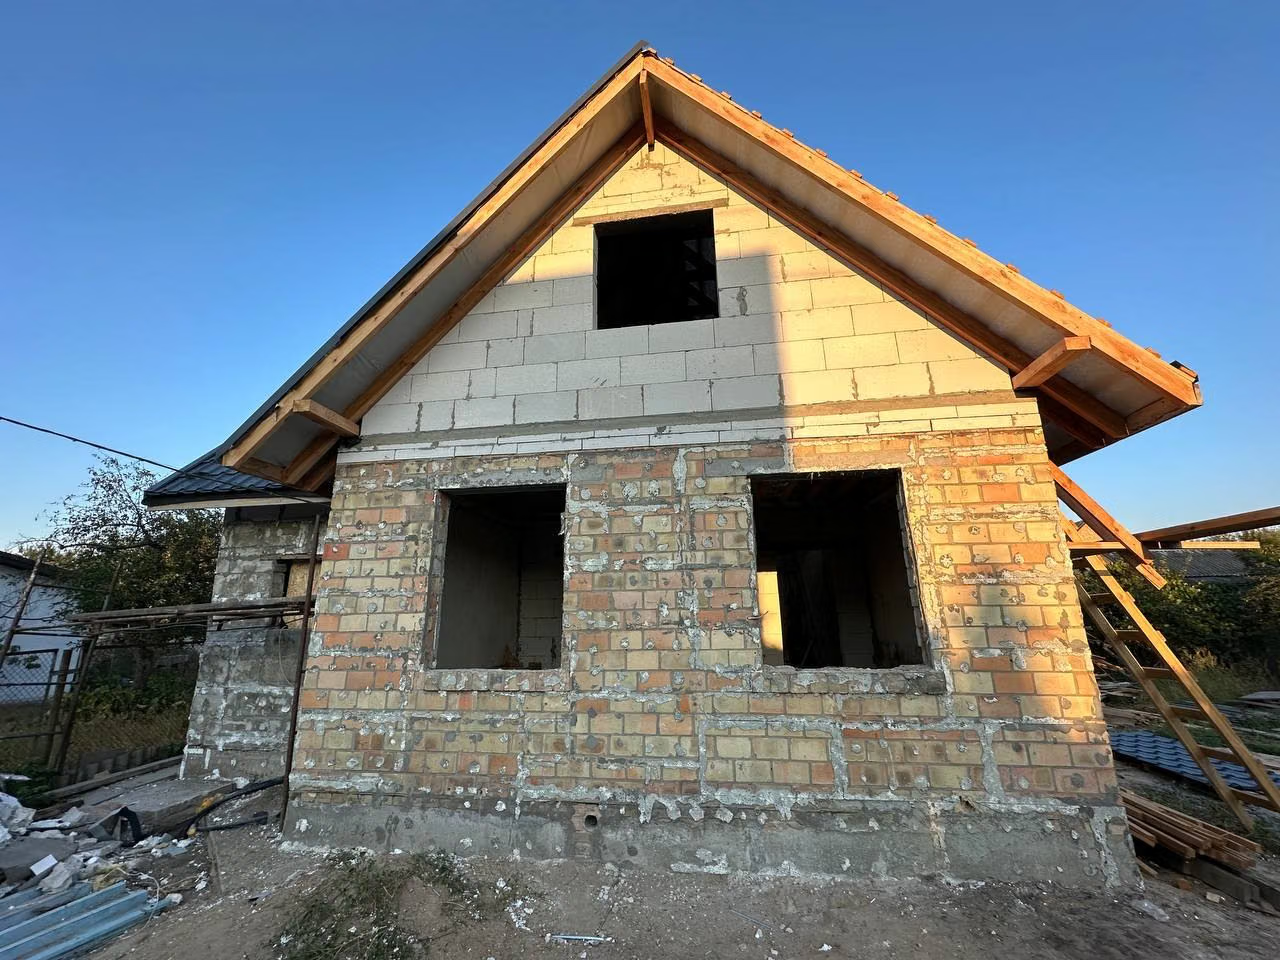
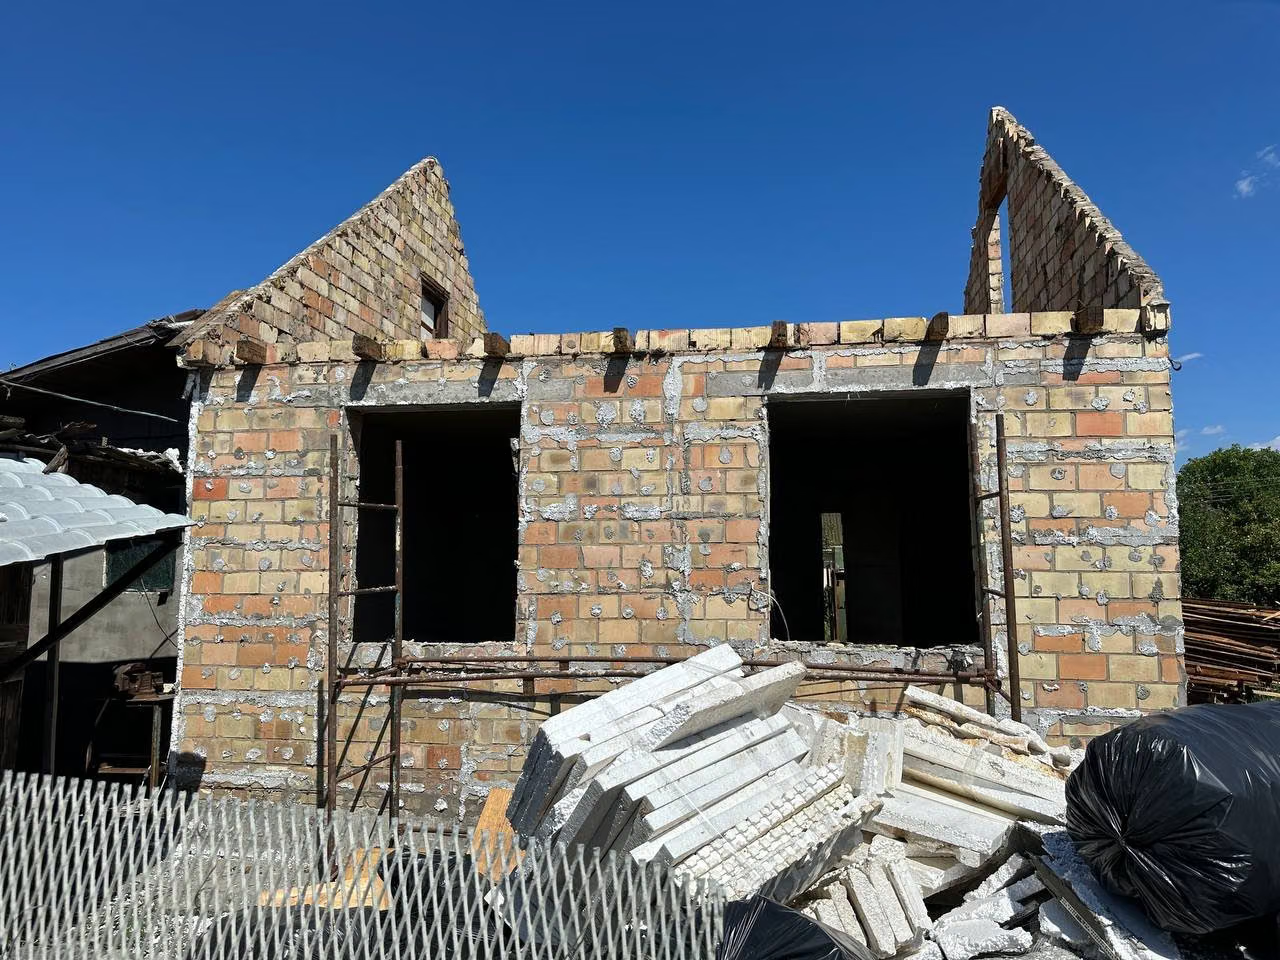
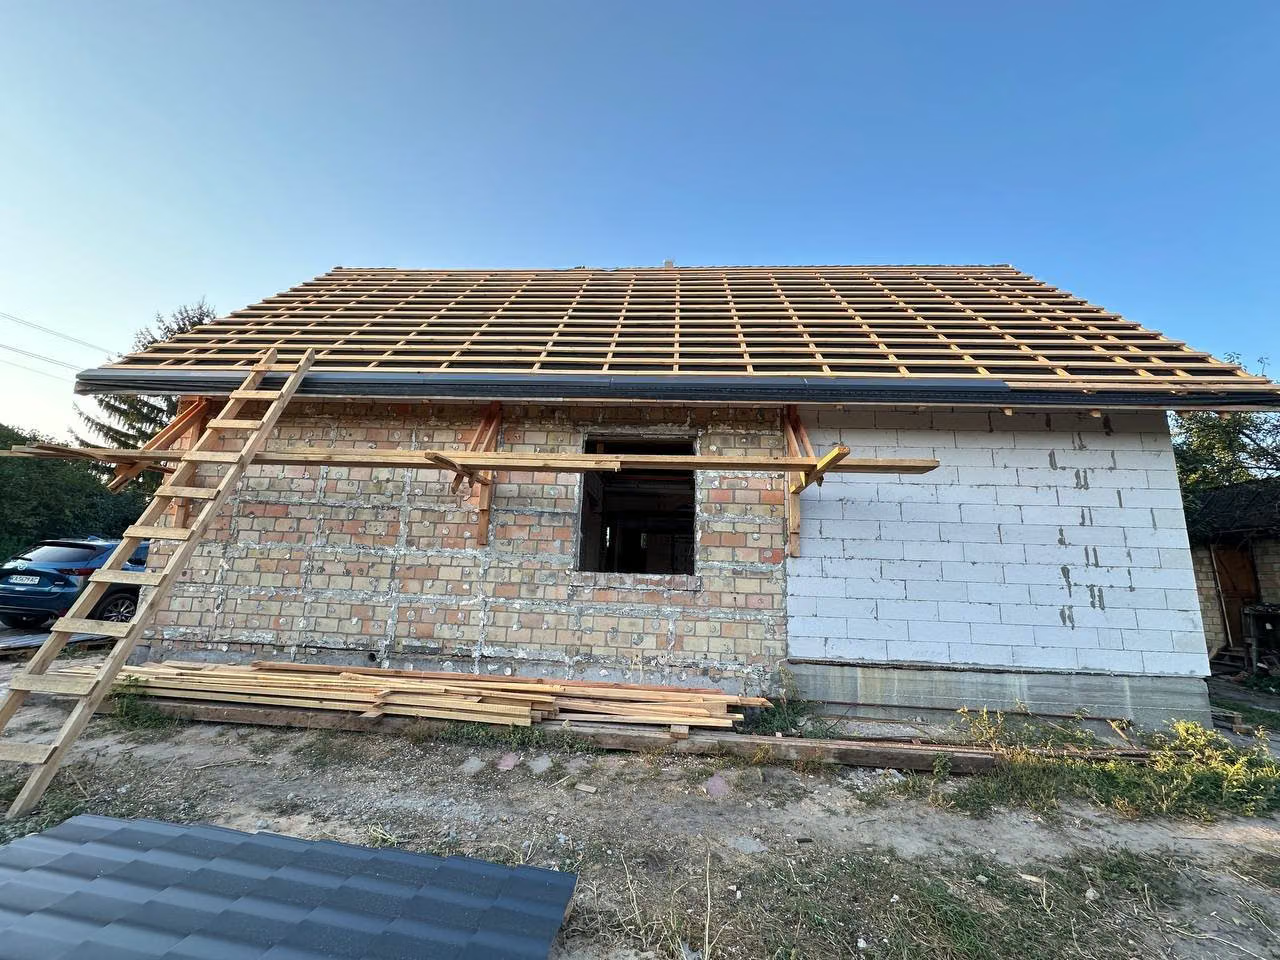
The house gable during the rebuild: brick walls, new blocks in the gable, empty window openings and the roof frame.Before
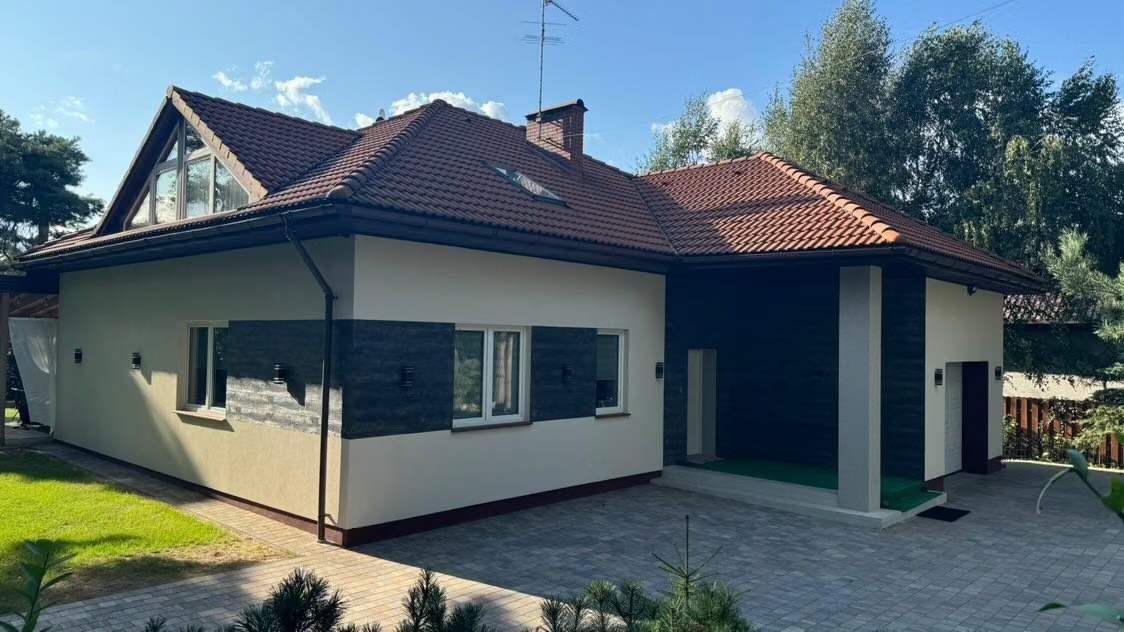
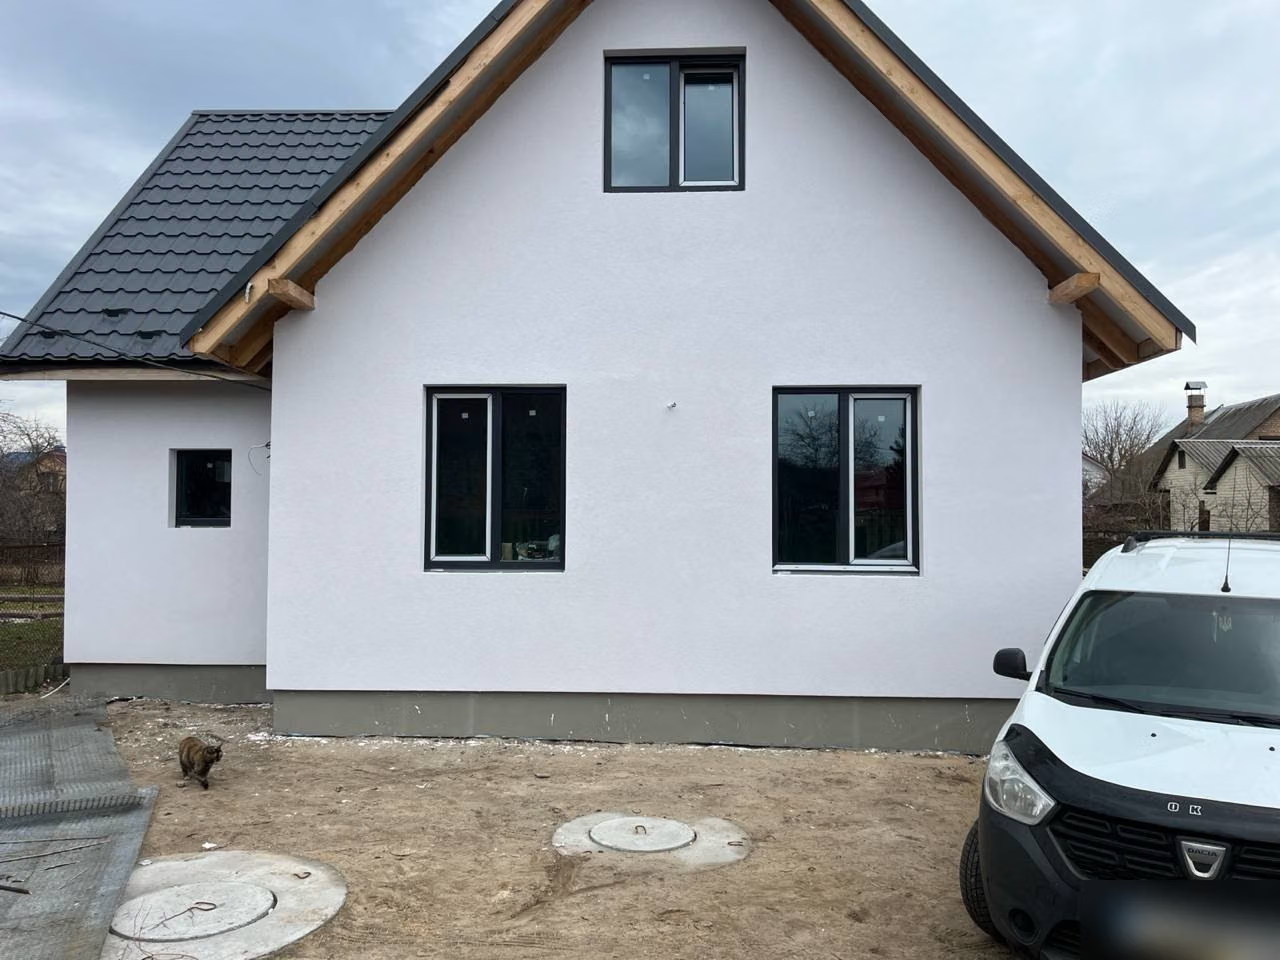
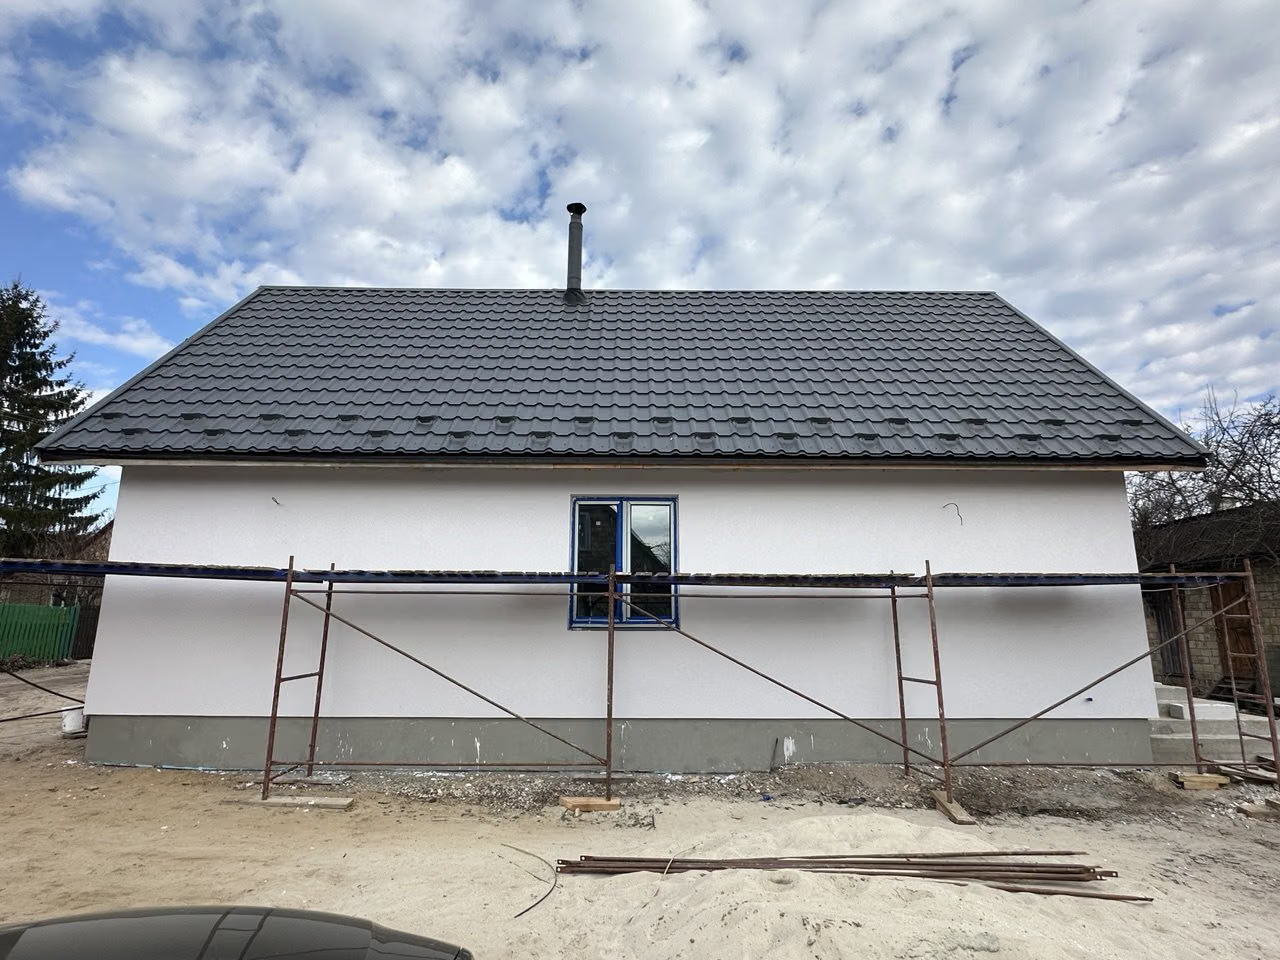
The same gable after the rebuild: white render, graphite windows and a metal tile roof.After
House gable — during the rebuild and after
Living room visualisation: a blue sofa in front of a fireplace clad in green tiles.Visualization
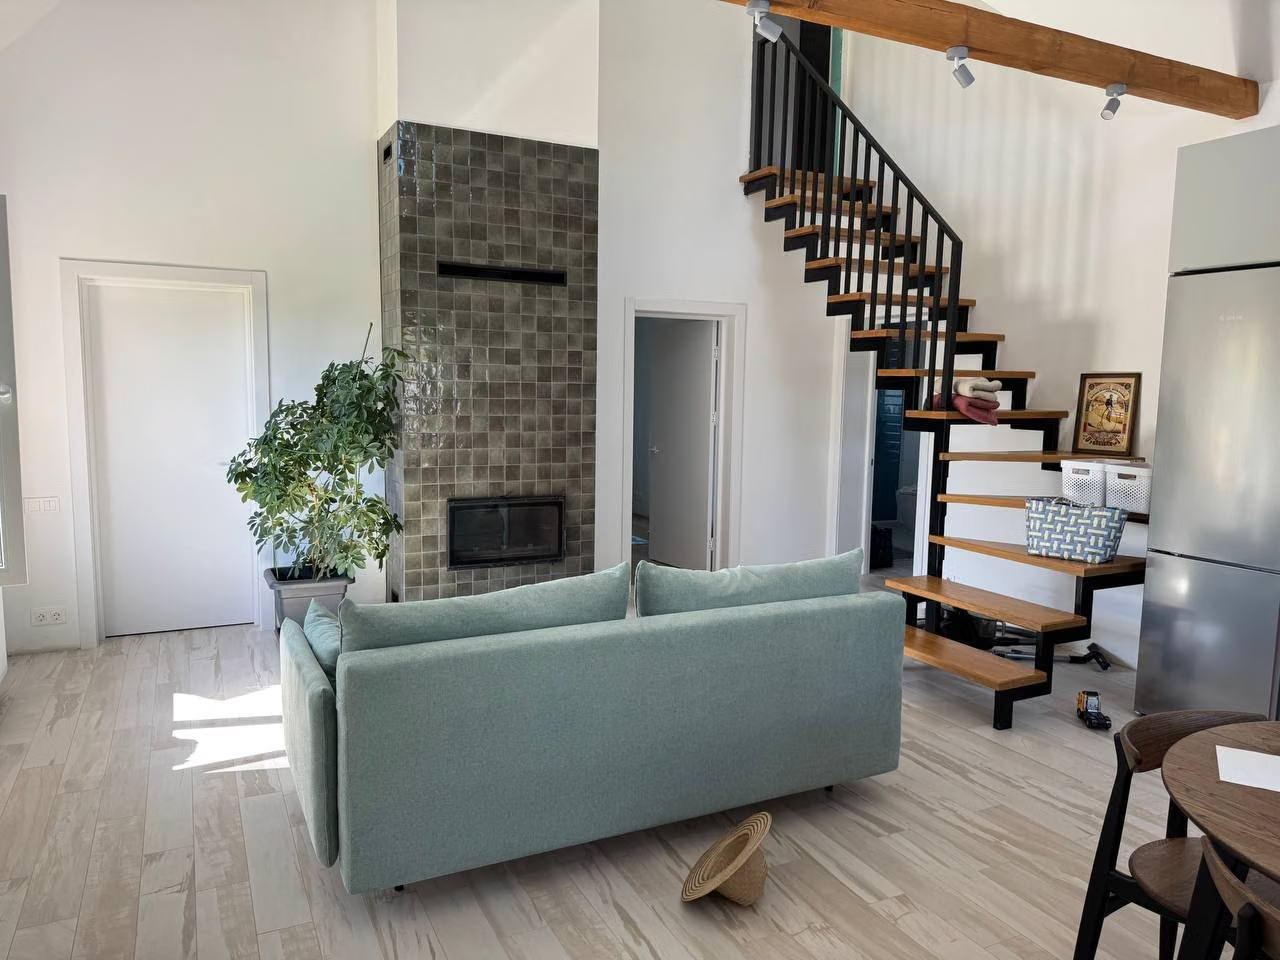
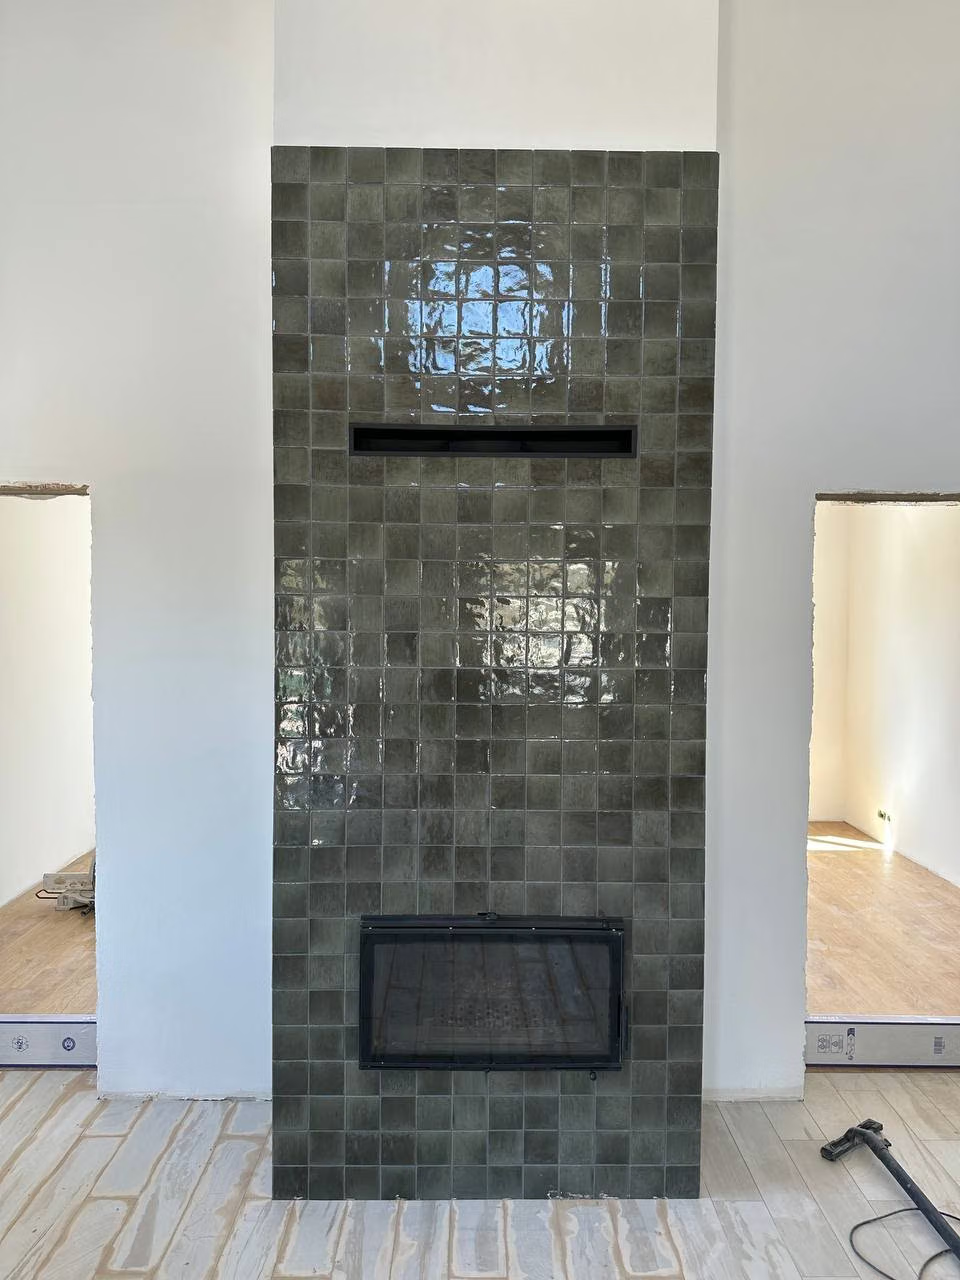
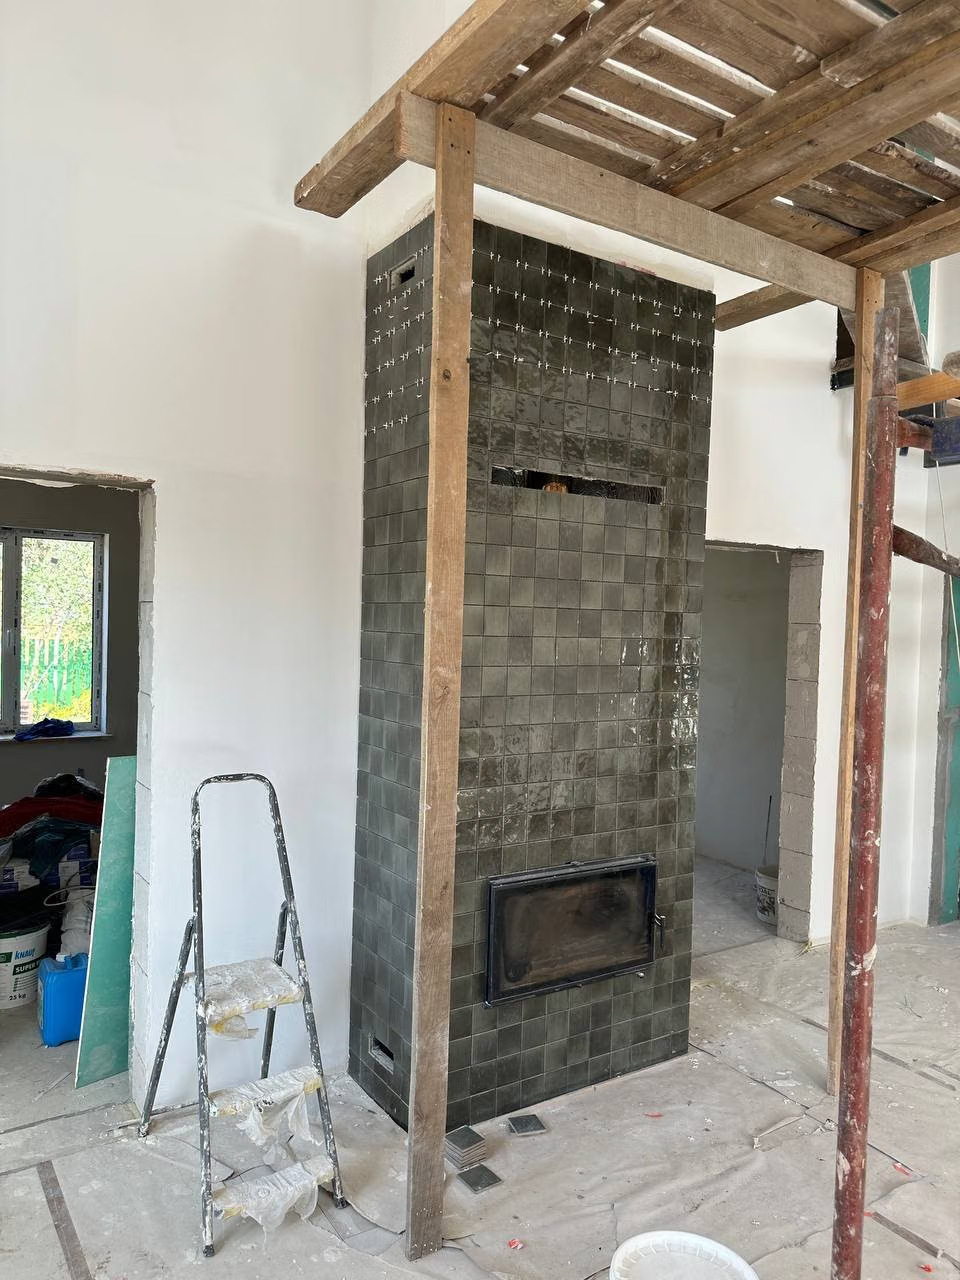
Fireplace as built: glossy green tiles from floor to ceiling, an insert and doors on both sides.Finished
Fireplace — visualisation and result. The visualisations were indicative, so the furnishings differ from the result.
04Process

From survey to finished interior

The stages of the design and renovation, as they actually went.

  1. 01
    Old brick house without a roof, with empty window openings.

    Starting point

    An old brick house with an unroofed upper storey.

  2. 02
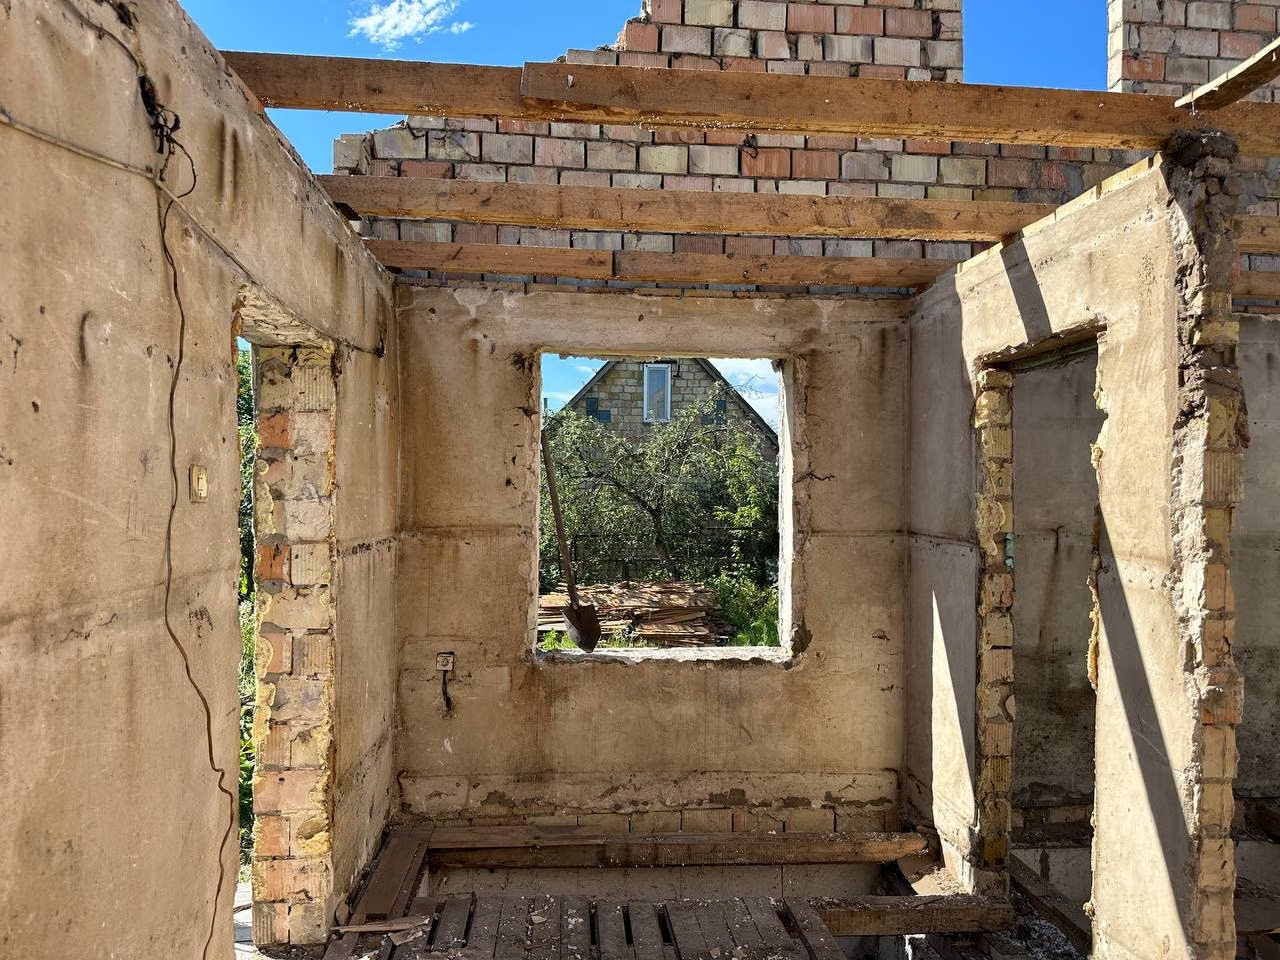
    Inside the house after the strip-out: bare walls, beams and sky instead of a roof.

    Strip-out

    Partitions and floors demolished — only the outer walls were left.

  3. 03
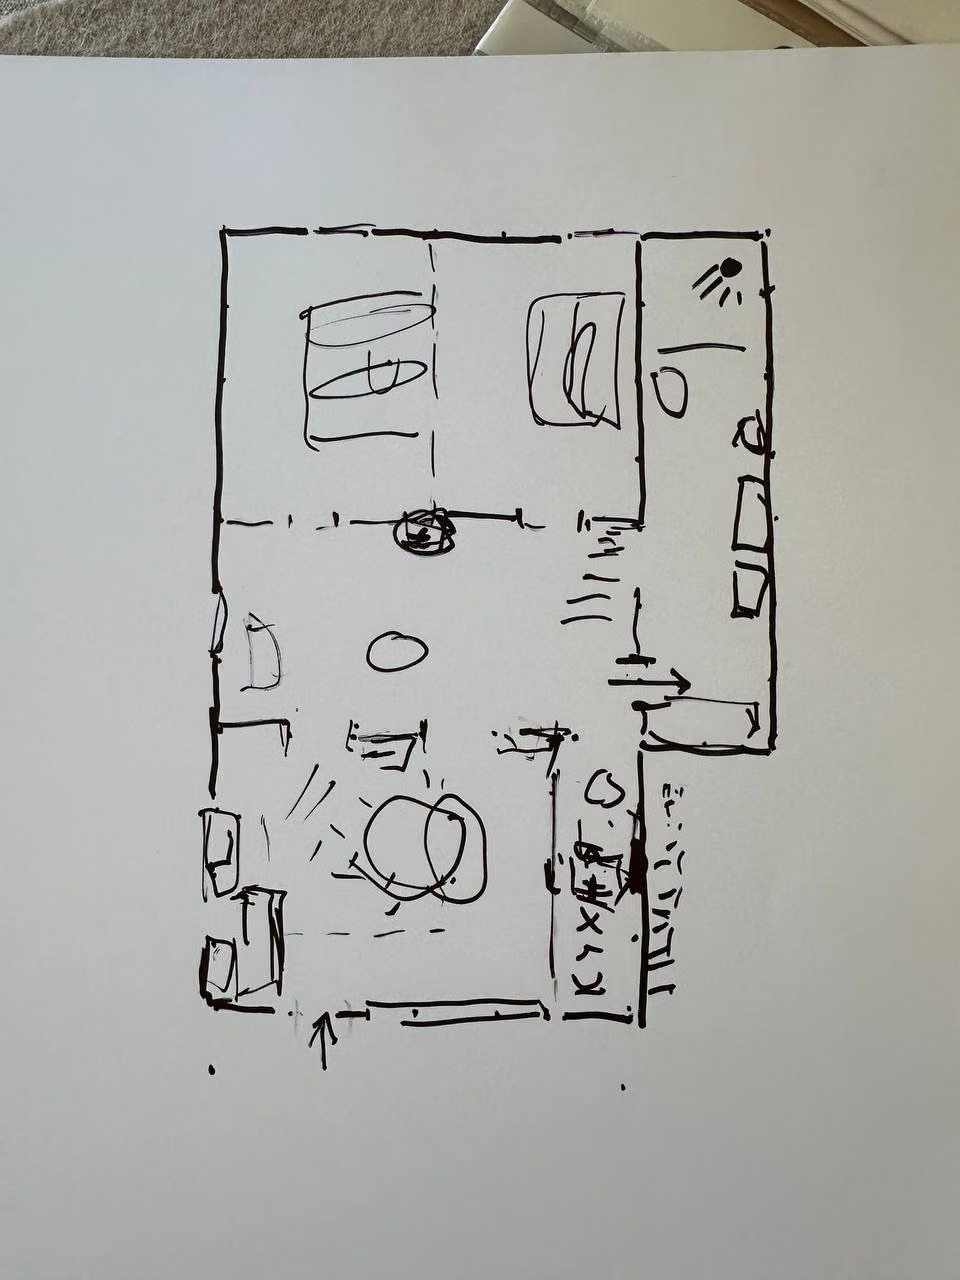
    Hand sketch of the ground floor plan with furniture.

    Layout sketch

    The first hand sketch: where the living room, kitchen, stairs and bathroom go.

  4. 04
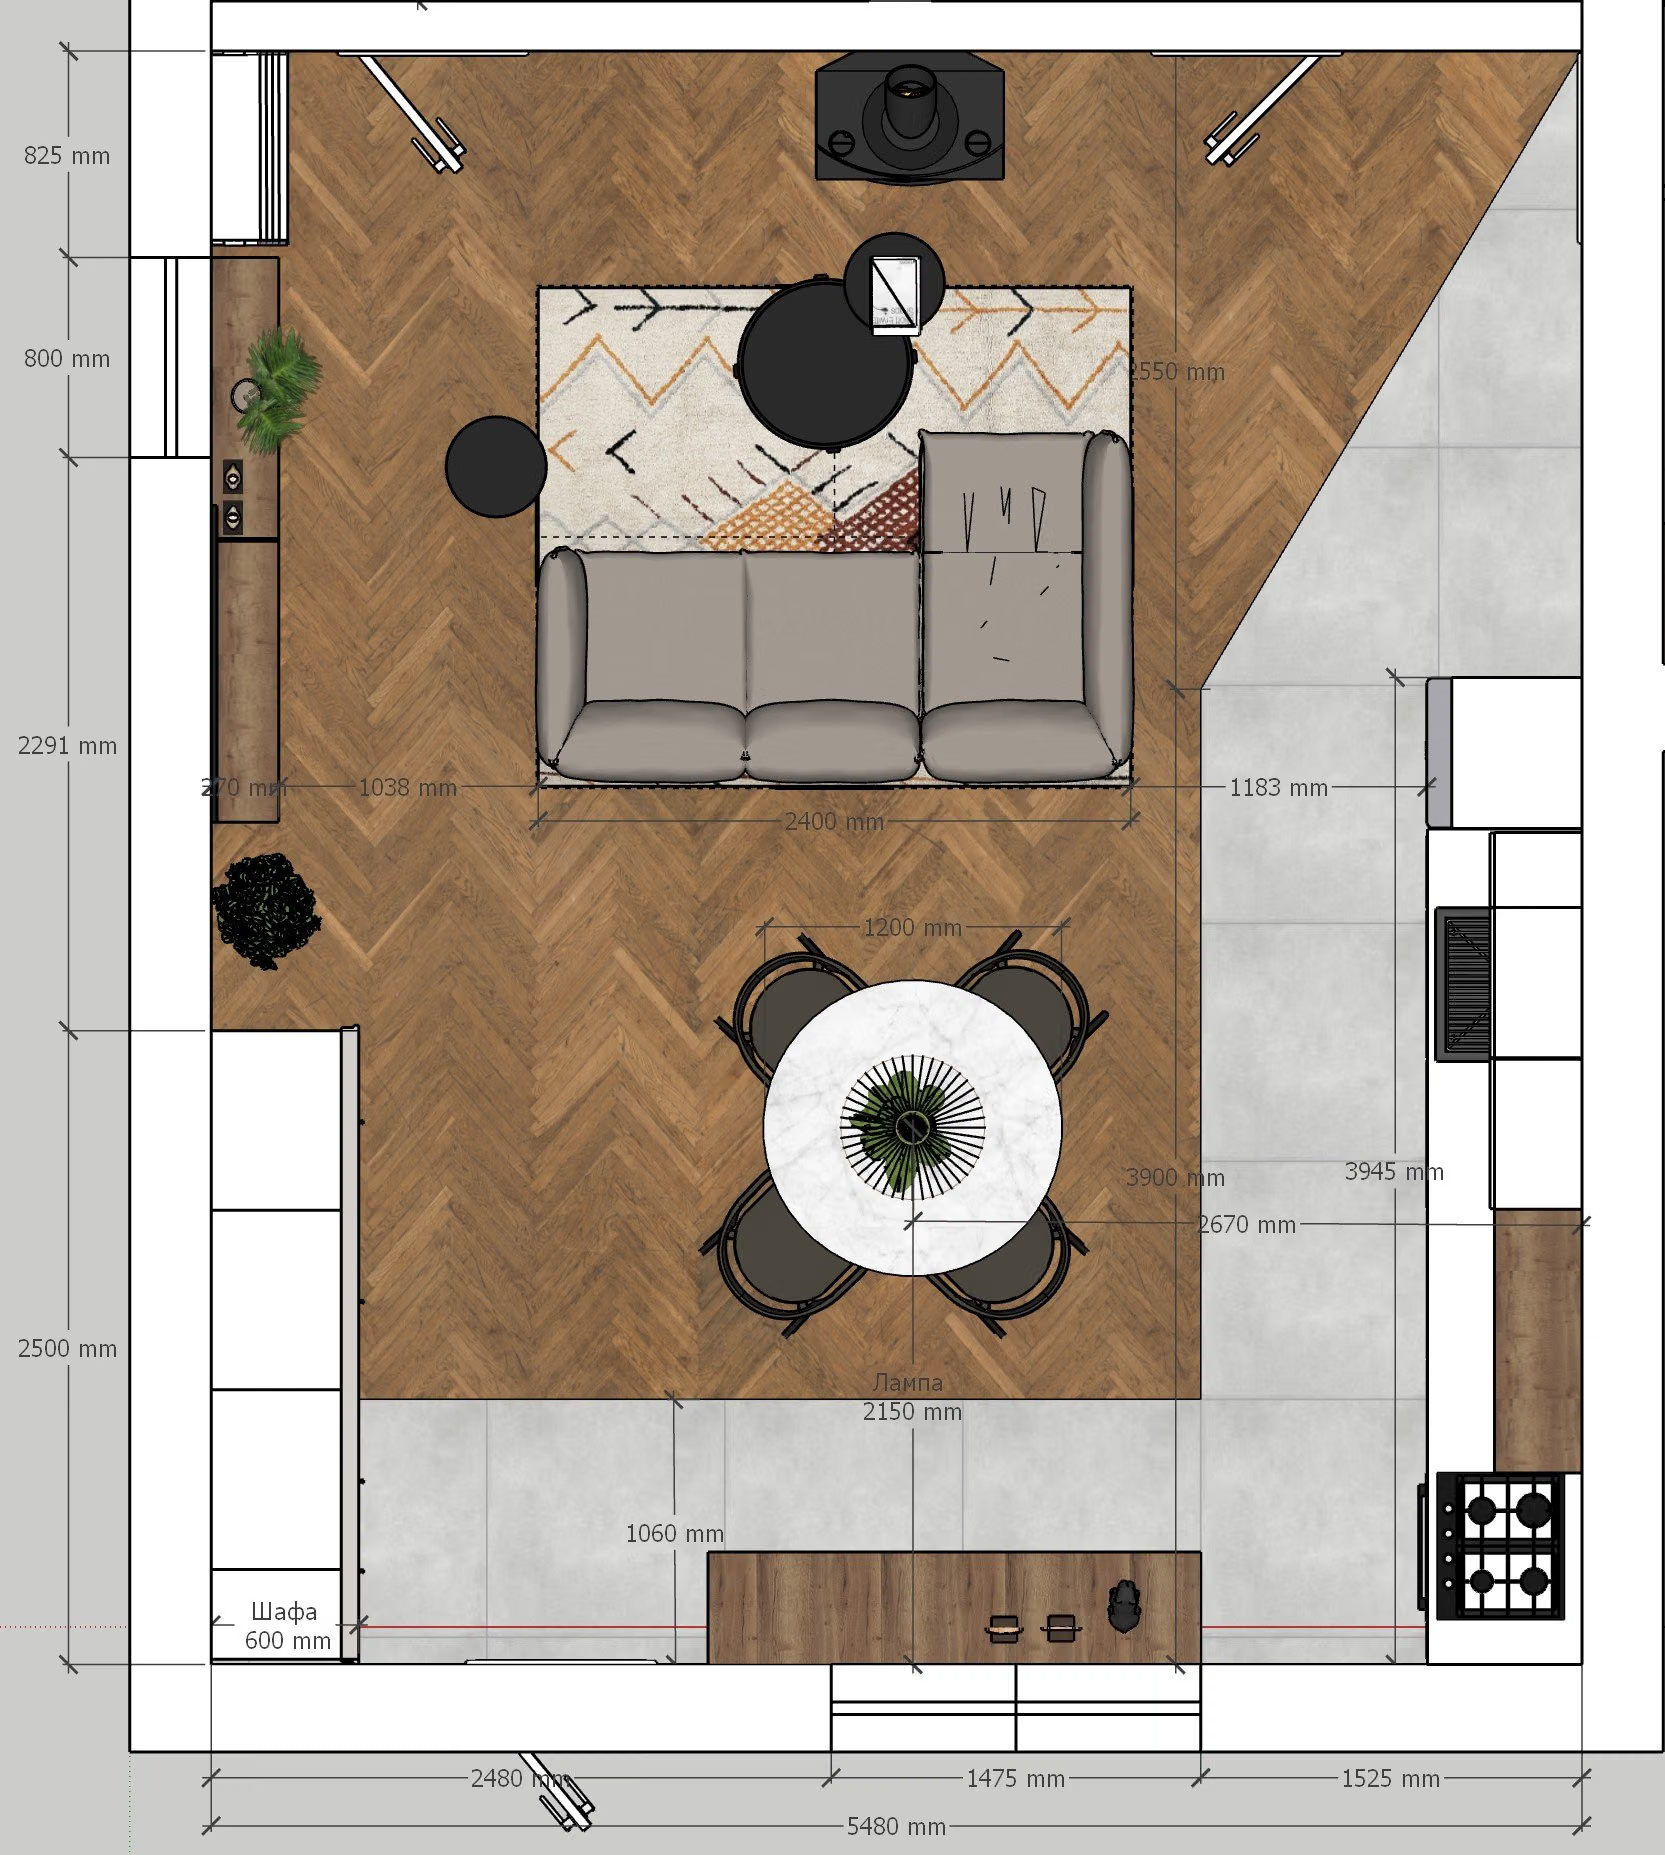
    Plan of the living room with kitchen and dining area, with dimensions.

    Dimensioned plan

    A functional layout with dimensions — the basis for the builders and carpenters.

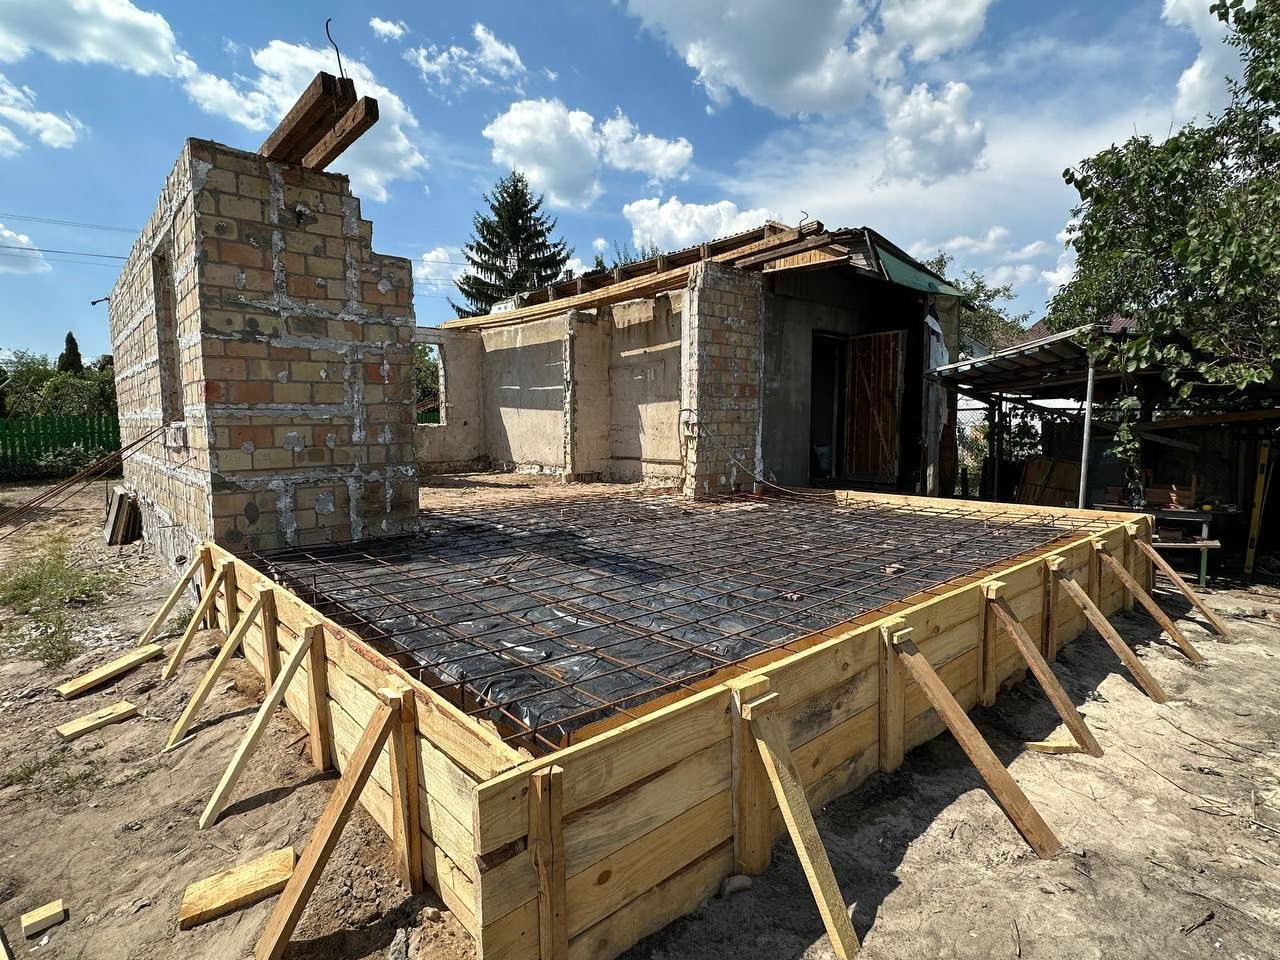
  5. 05
    Formwork and reinforcement of the extension's foundation next to the old walls.

    Extension foundation

    A new foundation for the extended part of the house.

  6. 06
    House with new block walls and the roof being covered.

    Walls and roof

    New block walls and a new roof.

  7. 07
    Visualisation of a terracotta kitchen under the stairs.

    3D visualisations

    Indicative visualisations so the clients could see how it would all look.

  8. 08
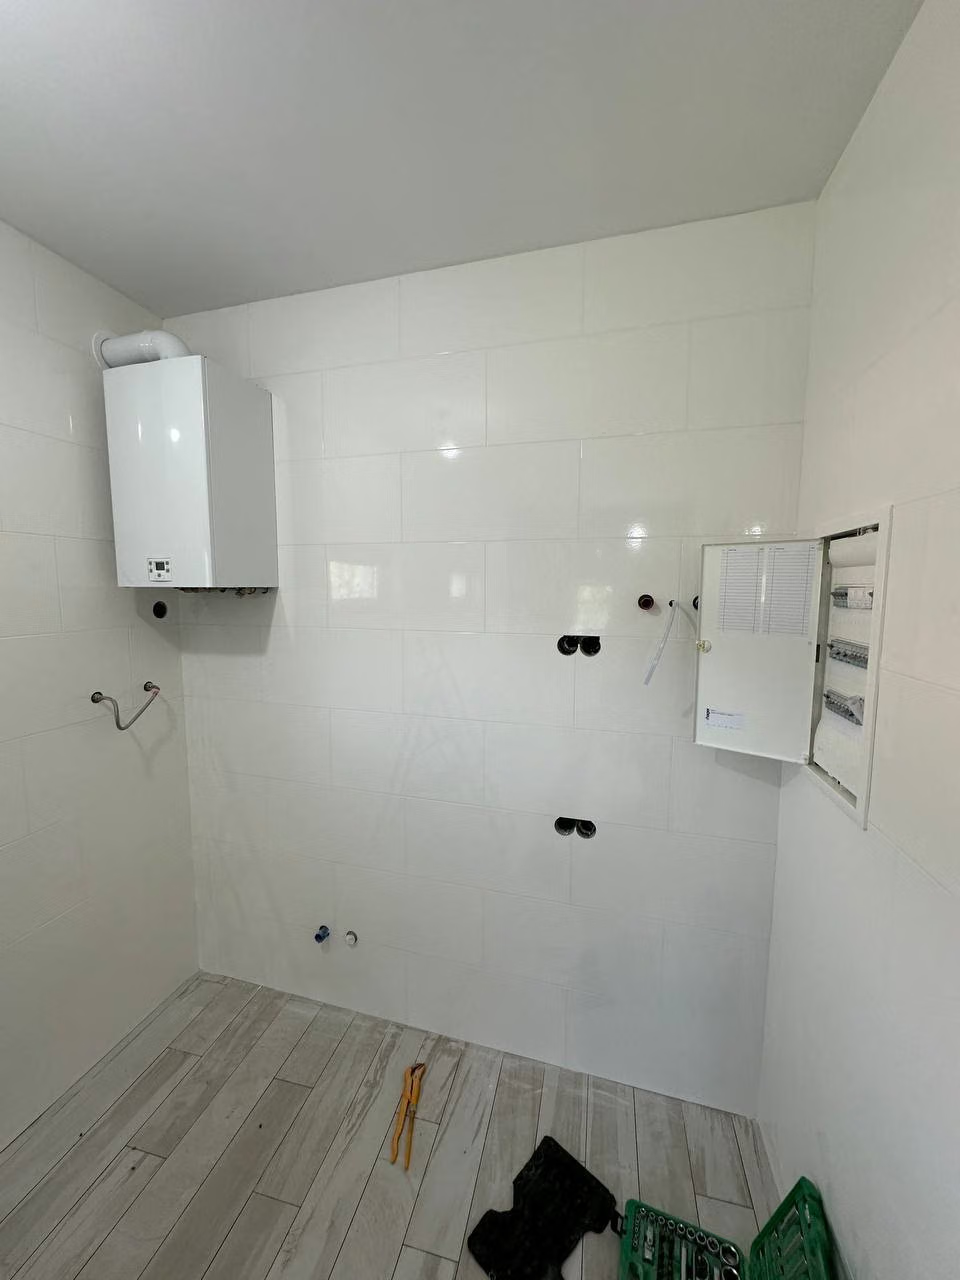
    Utility room with a boiler, fuse box and service outlets.

    Installations

    Wiring and plumbing run to the design.

  9. 09
    Fireplace clad in green tiles, timber scaffolding beside it.

    Finishes

    The fireplace clad in tiles, still in scaffolding.

  10. 10
    House after the rebuild: white render, graphite roof and scaffolding by the wall.

    Result

    The finished house with white render and a new roof.

05Decisions

Key design decisions

What I designed, and why that way.

01

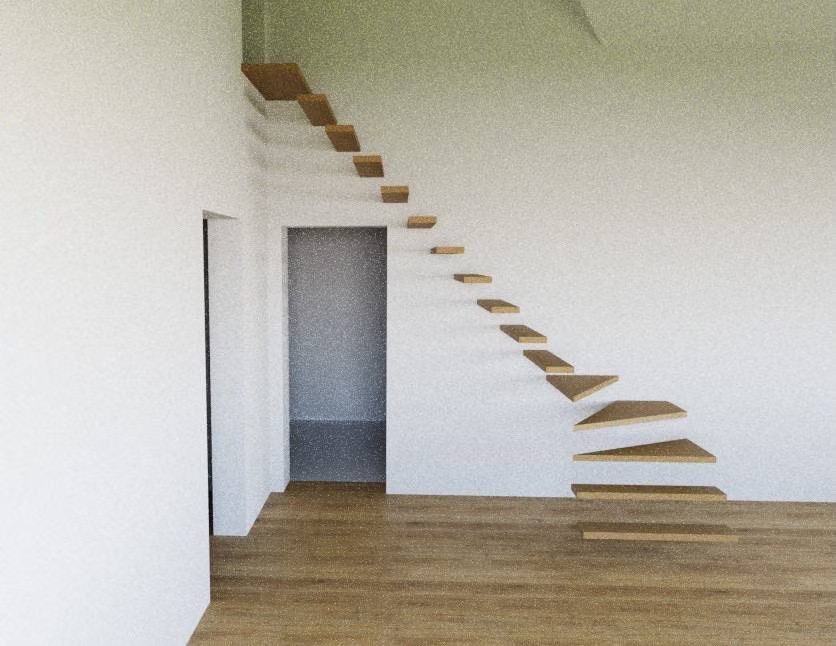
Problem The stairs had to fit in a very small space with a steep rise.

Several stair options

I prepared several stair options. The clients chose one, checked it with the builder, and the stairs fitted just as planned.

One of the stair options in a visualisation: cantilevered treads along the wall.
001 — Several stair options
02

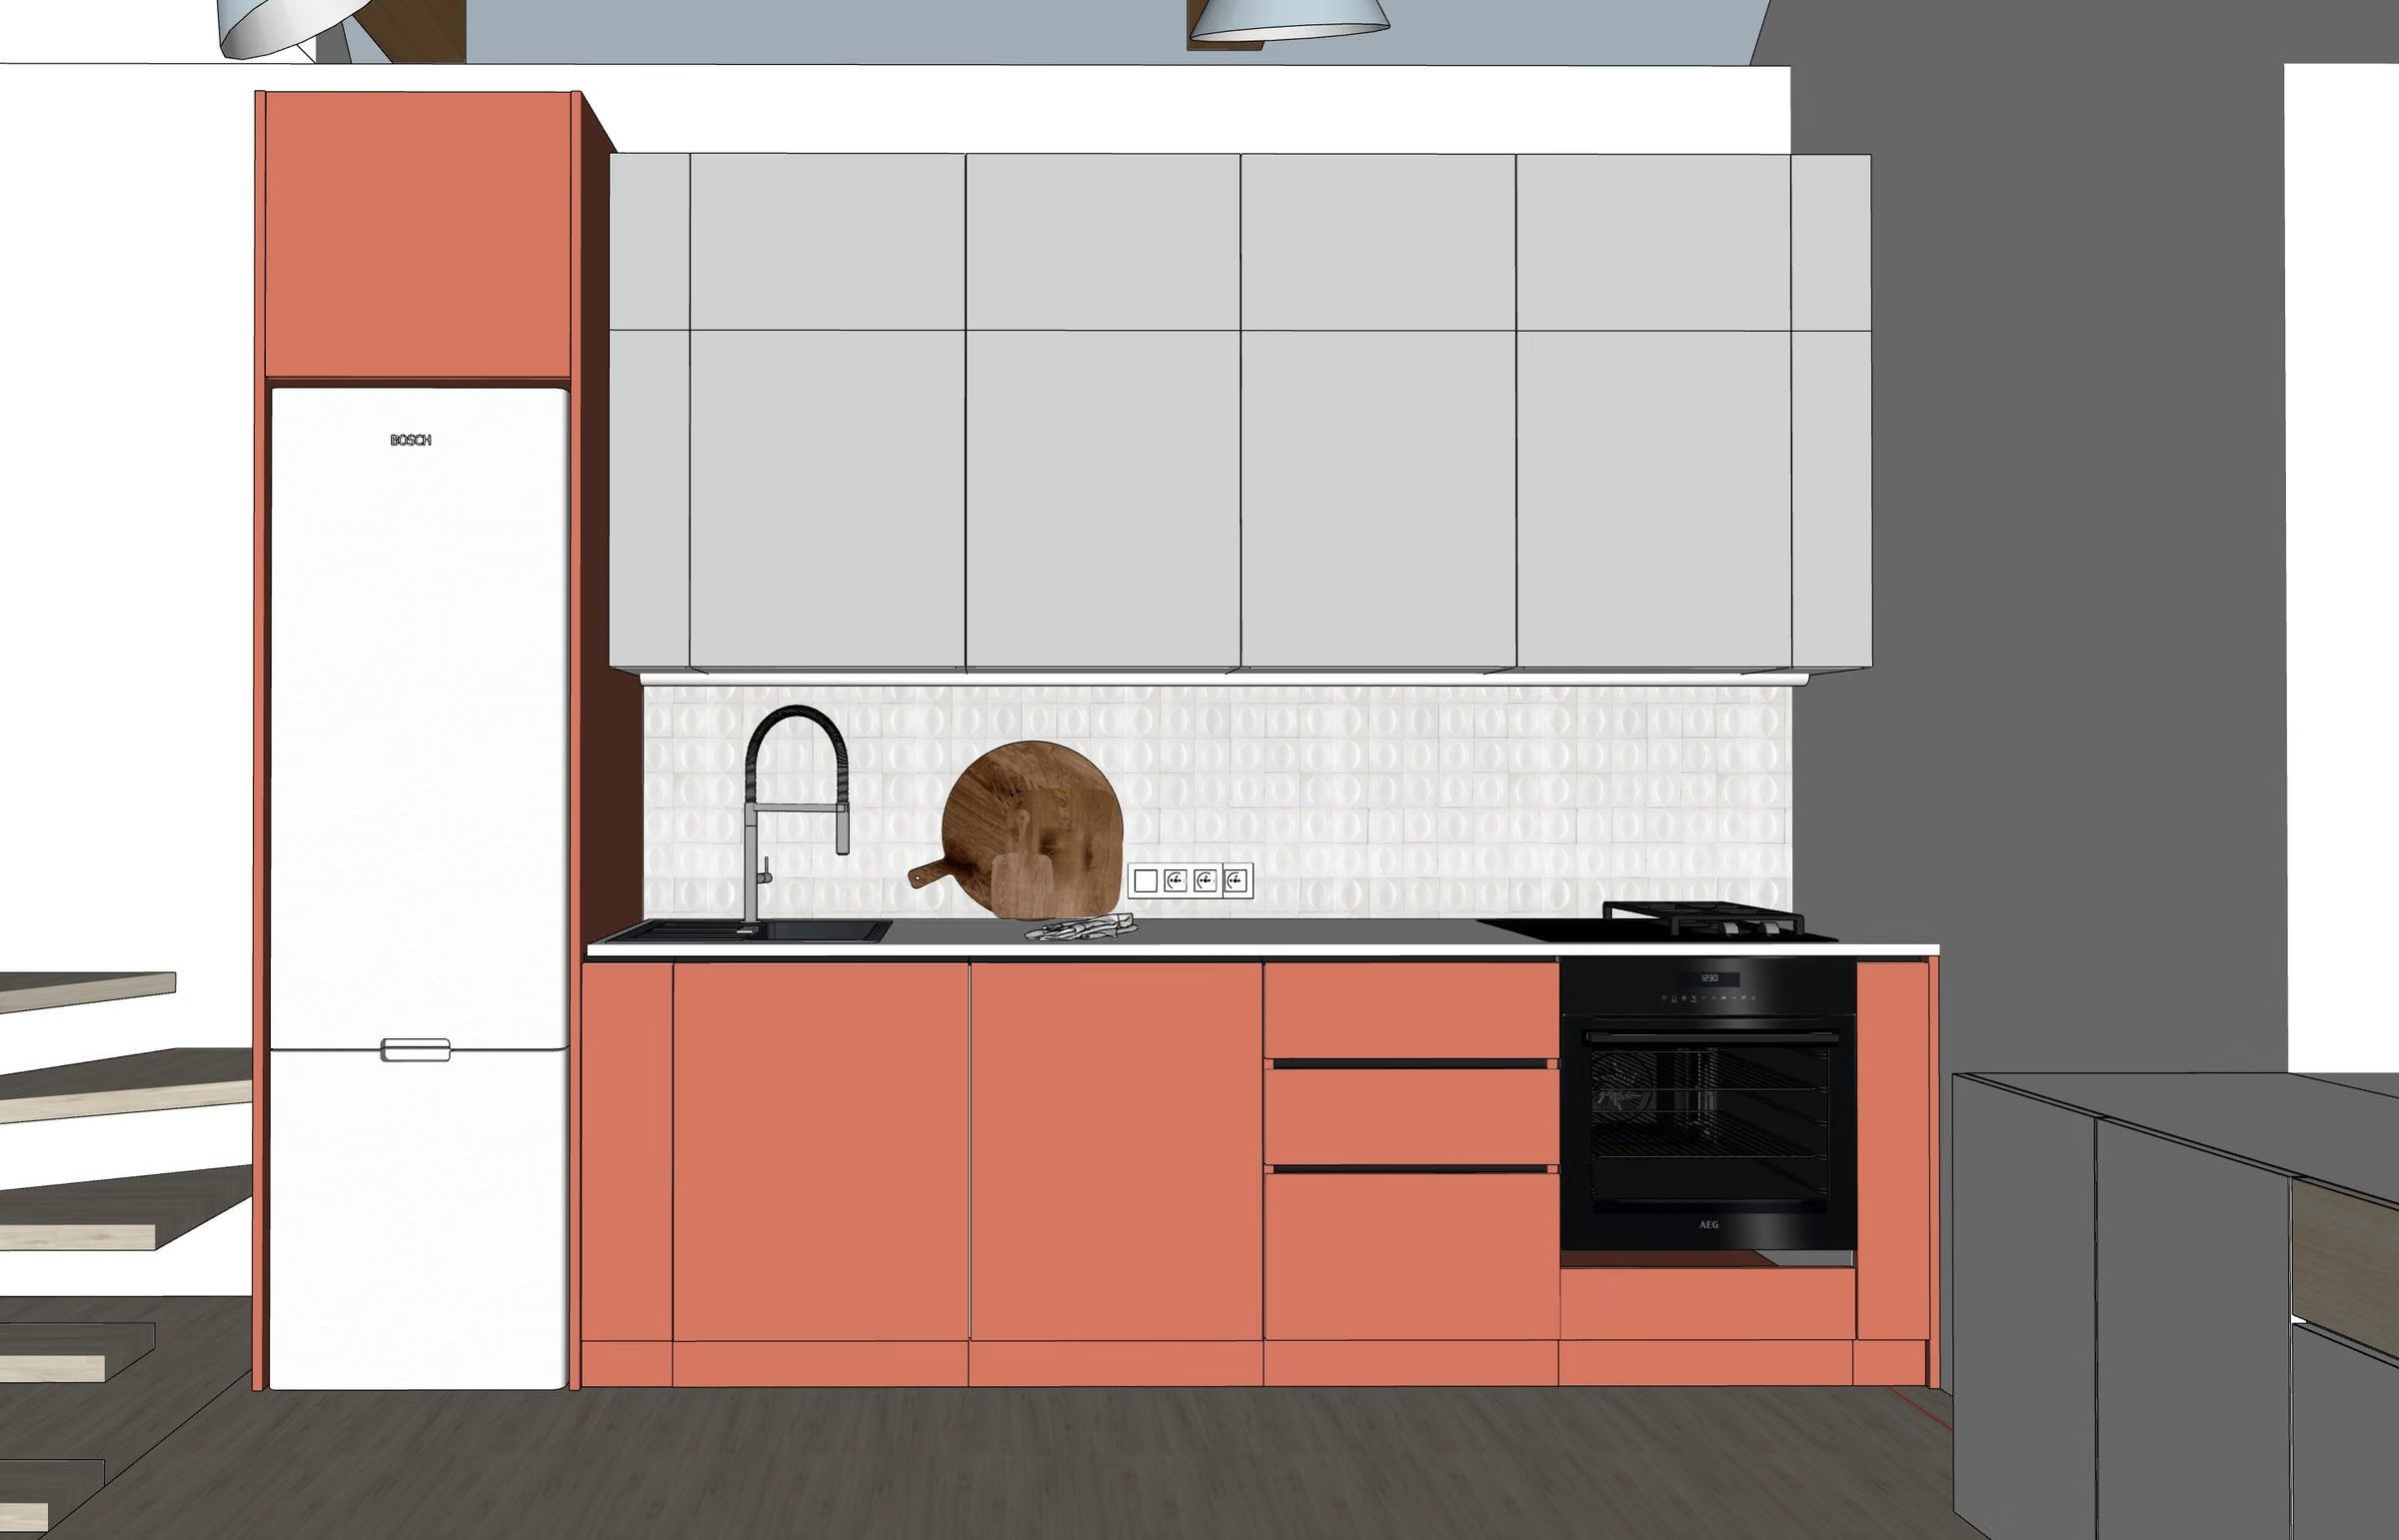
Technical drawings for carpenters

I drew the made-to-measure furniture in dimensioned elevations so the carpenters could work without guessing.

Kitchen elevation: terracotta base units, light grey wall cabinets and a tall fridge unit.
002 — Technical drawings for carpenters
03

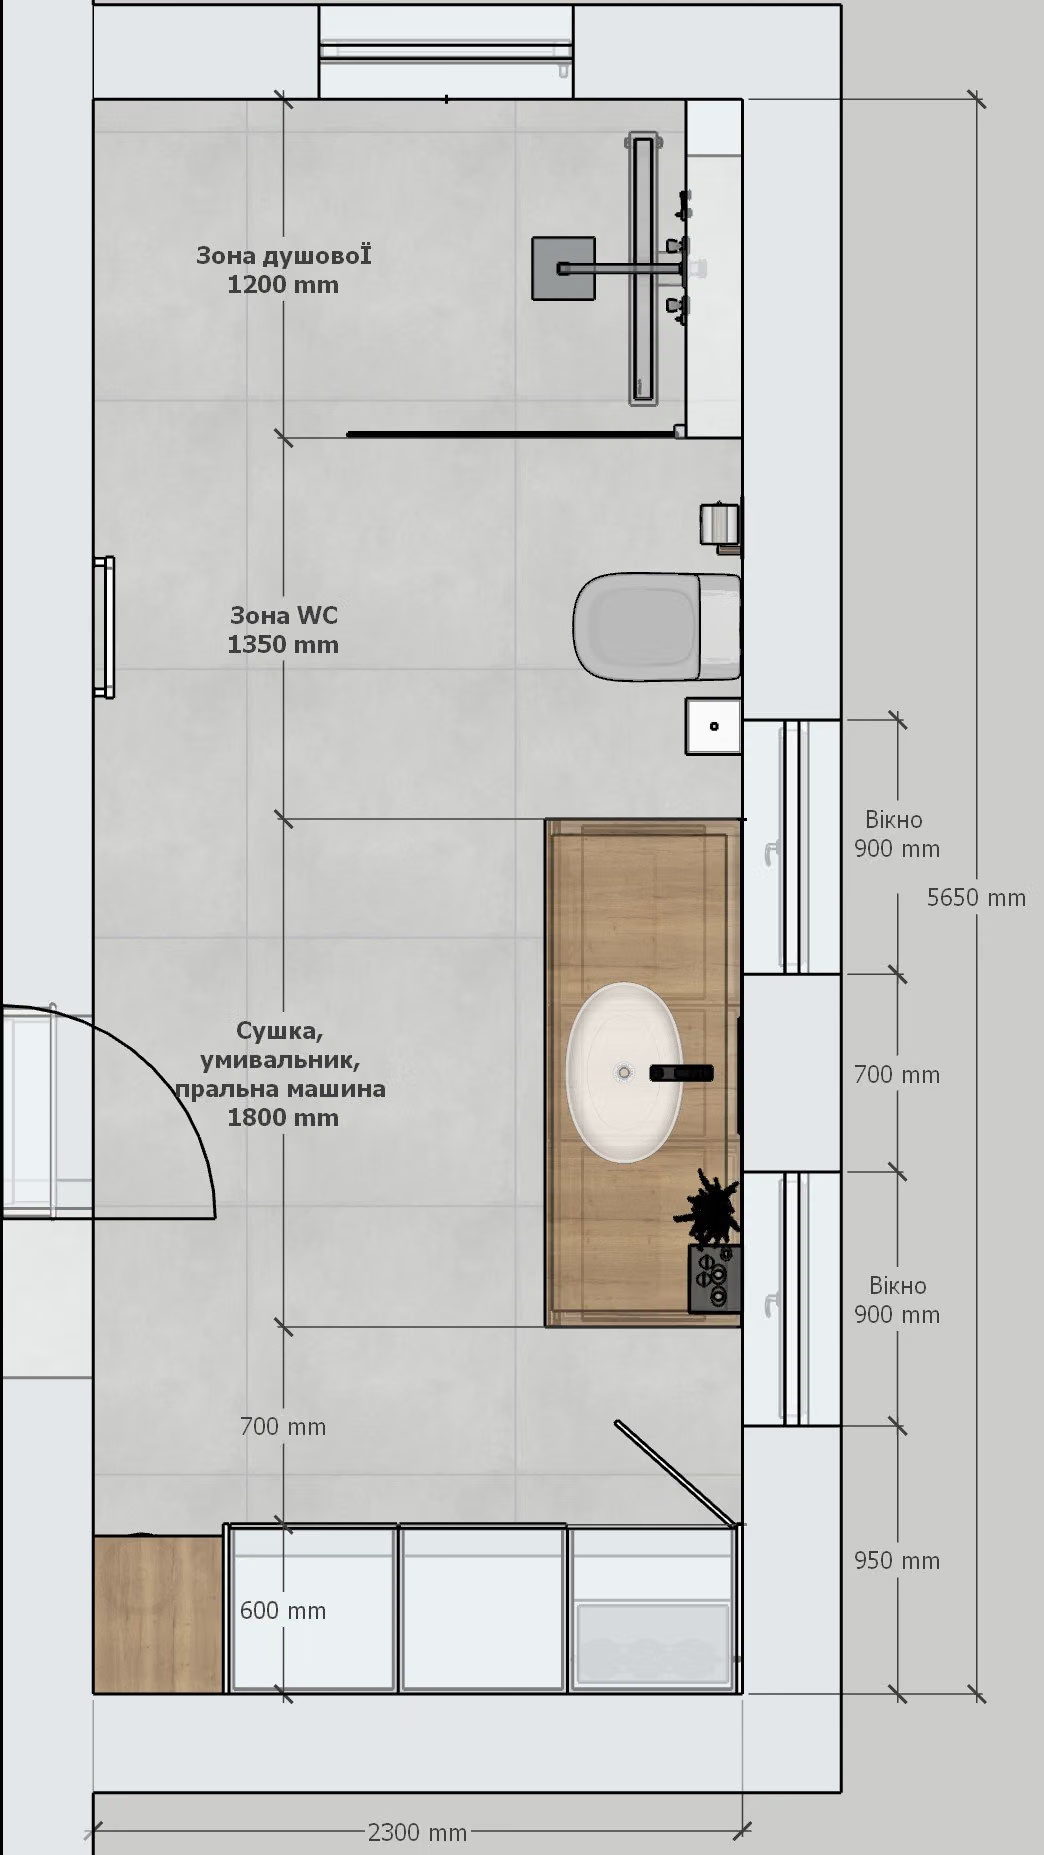
Wiring that follows the design

The clients wanted sockets, lights and connections exactly where the furnishings would stand. Electricians and carpenters got dimensioned drawings.

Bathroom plan with dimensions and the fittings laid out.
003 — Wiring that follows the design
06Materials

Materials and workmanship

What I chose, where it came from and what we kept.

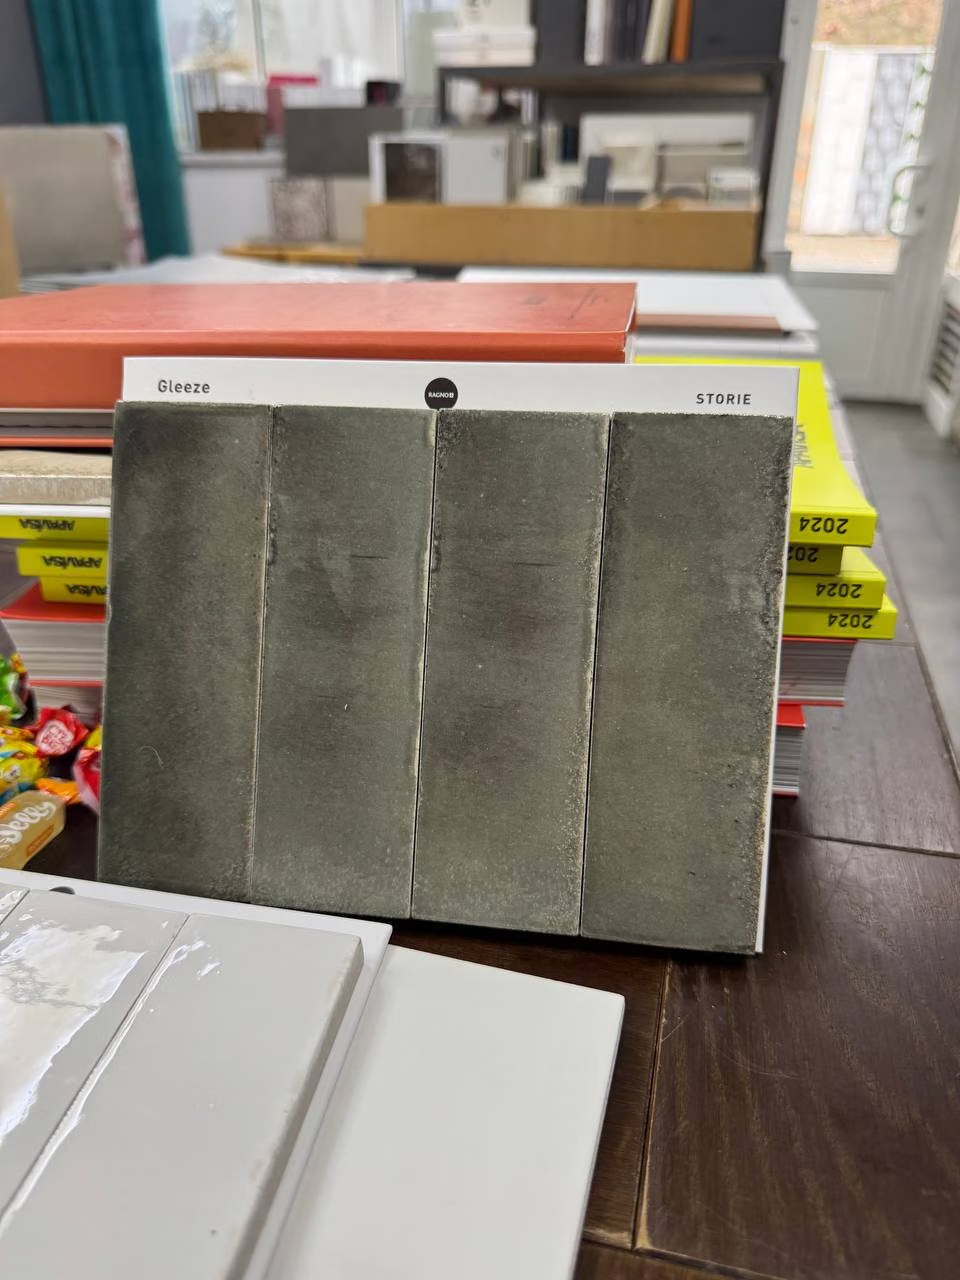
  • Glossy green tile samples in a tile showroom.

    Glossy green tile

    Chosen for the fireplace — the same one you see on the finished stack from floor to ceiling.

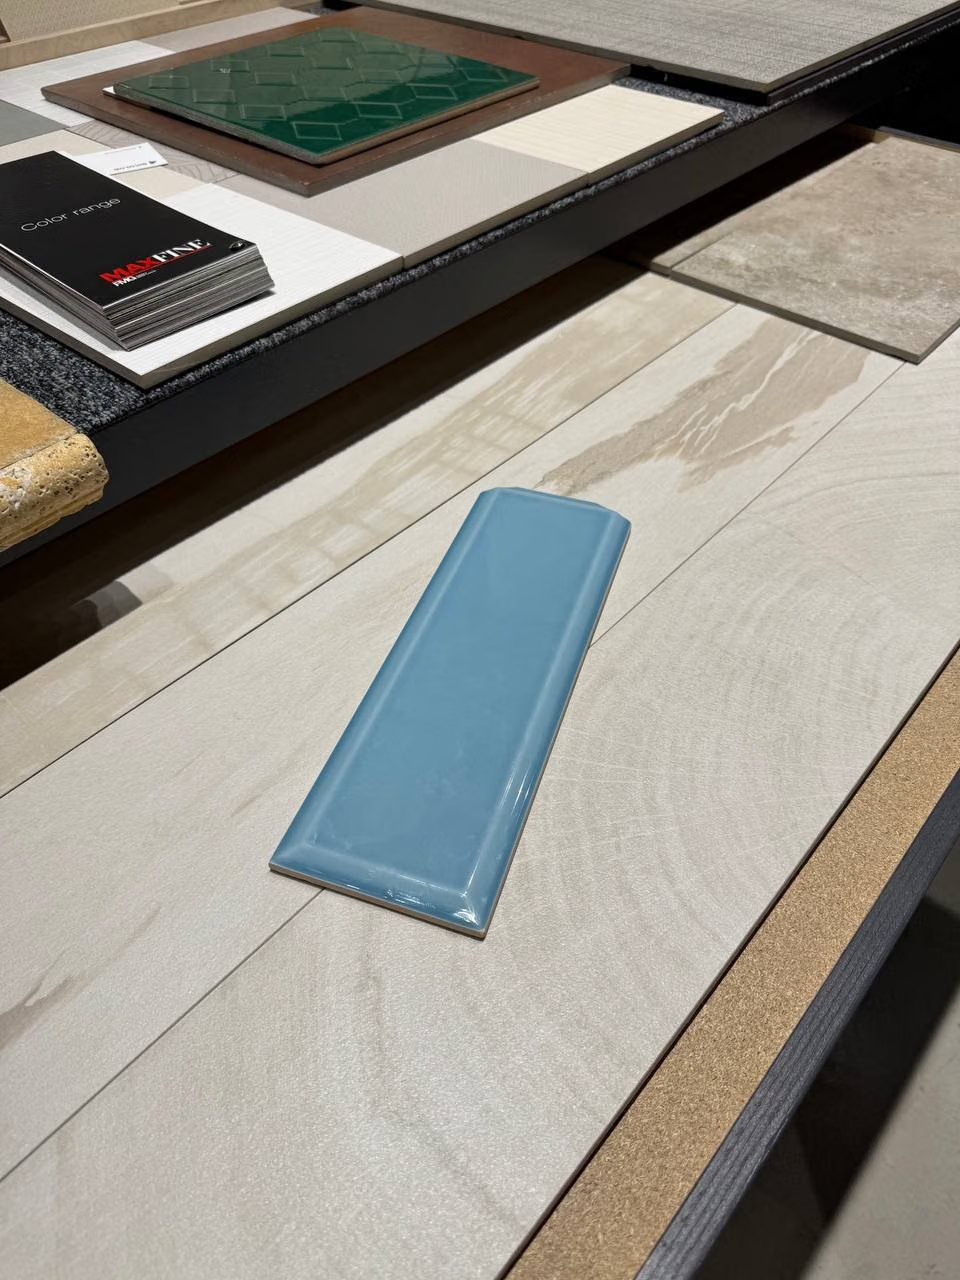
  • A long blue tile laid on a wood-look floor sample.

    Blue tile

    A bathroom tile sample, set against a wood-look floor.

RAL colours
Colours from the RAL palette, including RAL 7035 (light grey) and RAL 3022 (salmon).
Where it came from
Tiles, paints and floors from various showrooms; furniture made to measure.

The clients decided to rebuild an old house outside the city almost from scratch: the changes reached the foundations, they pulled down some walls, built new ones, put on a new roof and added an extension. They had a well-defined vision of the interior, so my role was support where decisions are hardest: the functional layout and made-to-measure furniture.

The stairs were the biggest challenge — a steep rise and very little room. I prepared several options, and the clients checked the chosen one with the builder. On top of that came technical drawings for carpenters and electricians, so every socket and every cabinet landed where we had planned.

Rebuilding a house and need a layout, stairs or drawings for your builders? Let’s talk.
Your project

Each of these projects started with a floor plan and a conversation

Send me your apartment's floor plan or tell me what you'd like to change. In 30 minutes we'll set the scope and I'll give you a quote — no obligation.

or call +48 455 447 586

← All case studies